
Bathroom Remodel Timeline: Realistic Schedules for Homeowners
A full bathroom remodel takes roughly 10–18 weeks from first consultation to final walkthrough, depending on scope. Cosmetic refreshes run shorter; gut renovations with layout changes run longer. Here is what that looks like in practice:
Cosmetic refresh (new fixtures, paint, vanity swap): 1–3 weeks of active construction, 2–4 weeks total with ordering
Standard remodel (new tile, tub/shower, vanity, plumbing updates): 3–6 weeks on site, 2–4 months total including design and permits
Full gut with layout changes: 6–12 weeks of active construction, 10–18 weeks total from first consult to final walkthrough
One action you can take today: order your vanity, shower glass, and specialty tile before demo starts. Those items drive more delays than any single trade.
Key Takeaways
A realistic bathroom remodel timeline separates active construction time from total project time, and the gap between those two numbers is where most homeowners get caught off guard.
Point | Details |
Total timeline by scope | Cosmetic: 2–4 weeks total; standard: 2–4 months; full gut: 10–18 weeks total. |
Order long-lead items early | Vanities, specialty tile, and frameless glass must be ordered before demo, not after. |
Inspections pause work | Rough plumbing and electrical inspections can stall the crew 1–3 days; schedule them early in the week. |
Build in contingency | Add 10–15% buffer for standard remodels, 15–20% for gut renovations. |
Coastal Home Renovations | Coastal manages permitting, material coordination, and scheduling for Suffolk County homeowners to reduce timeline risk. |
Table of Contents
What does a bathroom remodel timeline look like phase by phase?
Construction: what happens on site and how long each task takes
Post-construction closeout: the final steps before you call it done
How to choose a contractor and what your contract should include
How Coastal Home Renovations managed a real Suffolk County bathroom project
What does a bathroom remodel timeline look like phase by phase?
The gap between “active construction” and “total project time” trips up most homeowners. Your contractor might be on site for five weeks, but the full project from first meeting to usable bathroom often spans three to four months. Understanding where those weeks go makes planning far less stressful.
Phase | Typical Duration | Bathroom Usable? |
Pre-construction (design, selections, permits, ordering) | 3–6 weeks | Yes |
Active construction (demo through finishes) | multiple weeks depending on scope | No |
Post-construction (punch list, final inspection, closeout) | 3–7 days | Yes, by end of phase |
The three biggest time drivers across every scope:
Material lead times. Semi-custom vanities take 4–8 weeks; custom vanities run 8–14 weeks; frameless shower glass typically ships 2–4 weeks after tile is set.
Permit and inspection timing. Permit applications in many U.S. municipalities take 1–3 weeks to approve, and each inspection can pause work for 1–3 days.
Tile cure windows. Grout and mortar need time to cure before fixtures go in. Larger-format tile and complex patterns extend that window.
Pre-construction: what needs to happen before demo day
Pre-construction typically takes at least 3–4 weeks for design, selections, contractor interviews, and permit applications. If you are ordering custom items or waiting on a property closing, add more time on top of that.
Design and selections
Homeowner decision speed is the single most controllable variable in the entire project. Contractors cannot order materials until you have confirmed your tile, vanity, fixtures, and hardware. A week of indecision at this stage can push your start date back by two or three weeks once ordering lead times stack on top.
Work through selections in this order: tile (it sets the palette for everything else), vanity, plumbing fixtures, hardware, lighting. Lock each one before moving to the next.
Ordering long-lead items
Order as soon as selections are finalized, not after permits are approved. Lead times for common items:
Semi-custom vanities: 4–8 weeks
Custom vanities: 8–14 weeks
Specialty or imported tile: 2–6 weeks
Frameless shower glass: 2–4 weeks after tile is set and cured
Pro Tip: Have your contractor confirm the exact glass measurements after tile is installed, not before. Ordering glass to rough dimensions is one of the most common causes of a two-week delay at the end of a project.
Permit applications
Most bathroom remodels that involve moving plumbing, adding electrical circuits, or changing the layout require a permit. In Suffolk County and across most U.S. municipalities, permit applications take 1–3 weeks to process. Submit the application as soon as your contractor has finalized the scope of work. Waiting until after demo to pull permits is a red flag in any contractor.
Contractor hiring
Allow two to three weeks for interviews, bids, and contract signing. Get at least three bids. Ask each contractor for a written schedule before you sign anything.
Pre-construction checklist
Finalize all tile, vanity, fixture, and hardware selections
[ ] Confirm material orders are placed and lead times are documented
[ ] Permit application submitted (or confirmed not required for your scope)
[ ] Written project schedule in hand from contractor
[ ] Temporary bathroom access plan confirmed (especially if this is your only full bath)
[ ] Pre-demo moisture check or inspection scheduled
Construction: what happens on site and how long each task takes
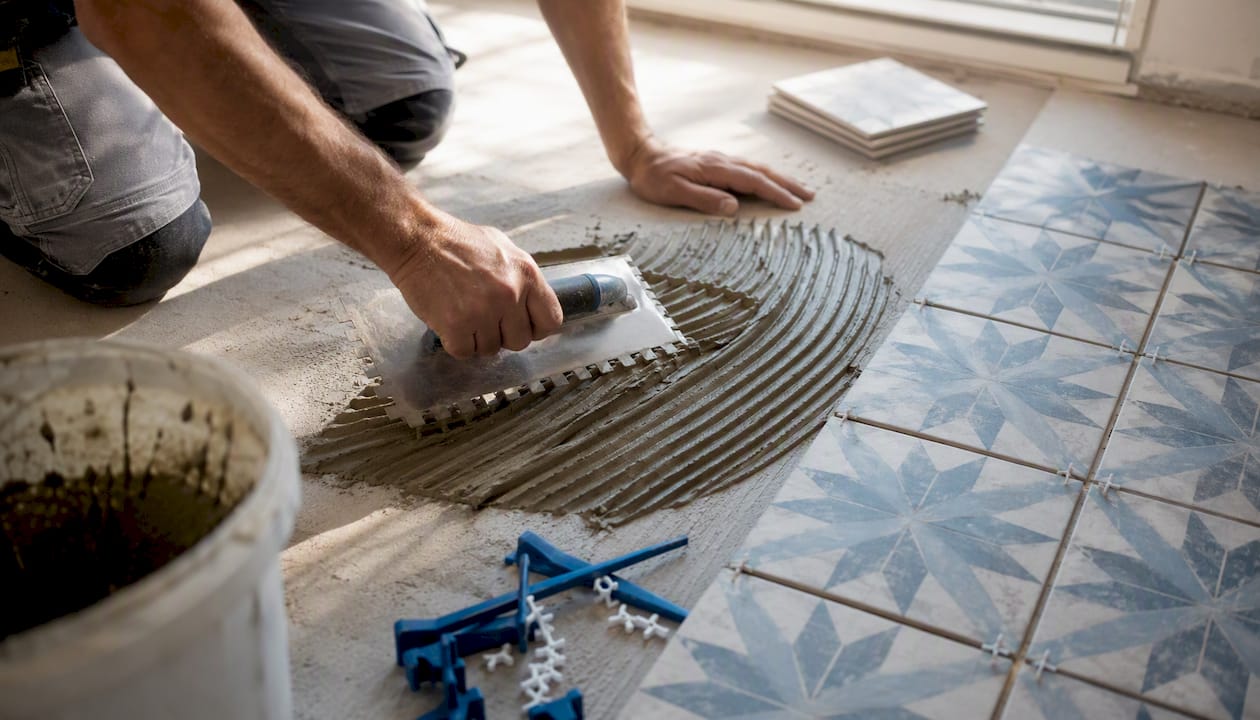
Active construction follows a fixed sequence. Trades cannot work out of order, which is why a delay in one task ripples through everything downstream. Tile installation and cure time is often the single longest active subtask, and larger-format tile or intricate patterns add meaningful time on top of the base estimate.
Task | Typical Duration | Notes |
Site protection and prep | about one day | Plastic sheeting, floor protection, dust barriers |
Demolition | a couple of days | Longer if asbestos or hidden damage is found |
Rough plumbing | 1–3 days | Longer for layout changes or new drain locations |
Rough electrical | a few days | Add time for panel upgrades or new circuits |
Rough inspections | 1–3 days wait | Depends on municipal backlog; schedule early in the week |
Waterproofing and backer board | a couple of days | Cure time may add a day before tile |
Tile installation | multiple days | Larger format and complex patterns take longer |
Tile grout cure | a few days | Do not install fixtures until cure is complete |
Countertops and glass | 1–2 days | Glass is templated after tile; add 2–4 weeks lead time |
Fixture installation | a few days | Toilet, vanity, faucets, shower valve trim |
Finishes (paint, caulk, accessories) | a few days | Final caulk lines, towel bars, mirrors, lighting |
Inspections are where projects stall most unexpectedly. Rough plumbing and electrical both require a passed inspection before walls can close. If your inspector cannot come until Thursday, you lose the rest of the week. Scheduling inspections for Monday or Tuesday gives the crew time to address any corrections and still move forward before the weekend.
Pro Tip: Ask your contractor which inspections are required for your specific scope before demo starts. Some municipalities require a pre-demo asbestos inspection for homes built before 1980. Knowing this in advance prevents a surprise two-week pause.
Living arrangements during construction deserve a real plan, not an afterthought. If this is your only full bathroom, you need a confirmed alternative before demo day: a gym membership, a neighbor’s agreement, or a temporary rental. Most contractors can sequence work to restore partial function (toilet access) within the first week, but confirm that in writing.
Post-construction closeout: the final steps before you call it done
Closeout typically takes three to seven days and covers the tasks that determine whether your bathroom is actually finished or just visually finished.
Final walkthrough checklist
Walk through with your contractor before signing off. Check every item:
All tile grout lines are consistent and fully cured
Caulk lines at tub, shower, and vanity are clean and unbroken
All fixtures operate correctly (flush, drain, hot/cold, pressure)
Shower glass is sealed and panels are plumb
Exhaust fan operates and vents to the exterior
Paint is complete with no missed spots or lap marks
All hardware is tight and aligned
Final inspection is passed and documented
Paperwork to request at closeout
Do not skip this step. Get the following before your contractor leaves:
Warranty documentation for all installed fixtures and materials
Product manuals for toilet, faucet, shower valve, and exhaust fan
Final lien release from the contractor and any subcontractors
Certificate of occupancy or final inspection sign-off from the municipality
Permit card (some municipalities require you to keep this)
Three sample schedules you can adapt for your project
These week-by-week examples give you a framework to share with your contractor. Build in buffer days at the end of each phase, not just at the end of the project.
Small cosmetic remodel (vanity, fixtures, paint, no tile work)
Week | Activity |
Weeks 1–2 | Selections, ordering, contractor confirmation |
Week 3 | Demo, vanity swap, fixture installation, paint |
Week 4 | Punch list, final walkthrough, closeout |
Total: roughly 3–4 weeks. Note that prefab or prebuilt surround systems can compress a tub/shower refresh to a single day, but custom tile always takes longer.
Mid-range remodel (new tile, tub/shower, vanity, plumbing updates)
Week | Activity |
Weeks 1–3 | Design, selections, permit application, material orders |
Week 4 | Demo, rough plumbing and electrical |
Week 5 | Inspections, waterproofing, backer board |
Weeks 6–7 | Tile installation and cure |
Week 8 | Countertops, glass, fixtures, finishes |
Week 9 | Punch list, final inspection, closeout |
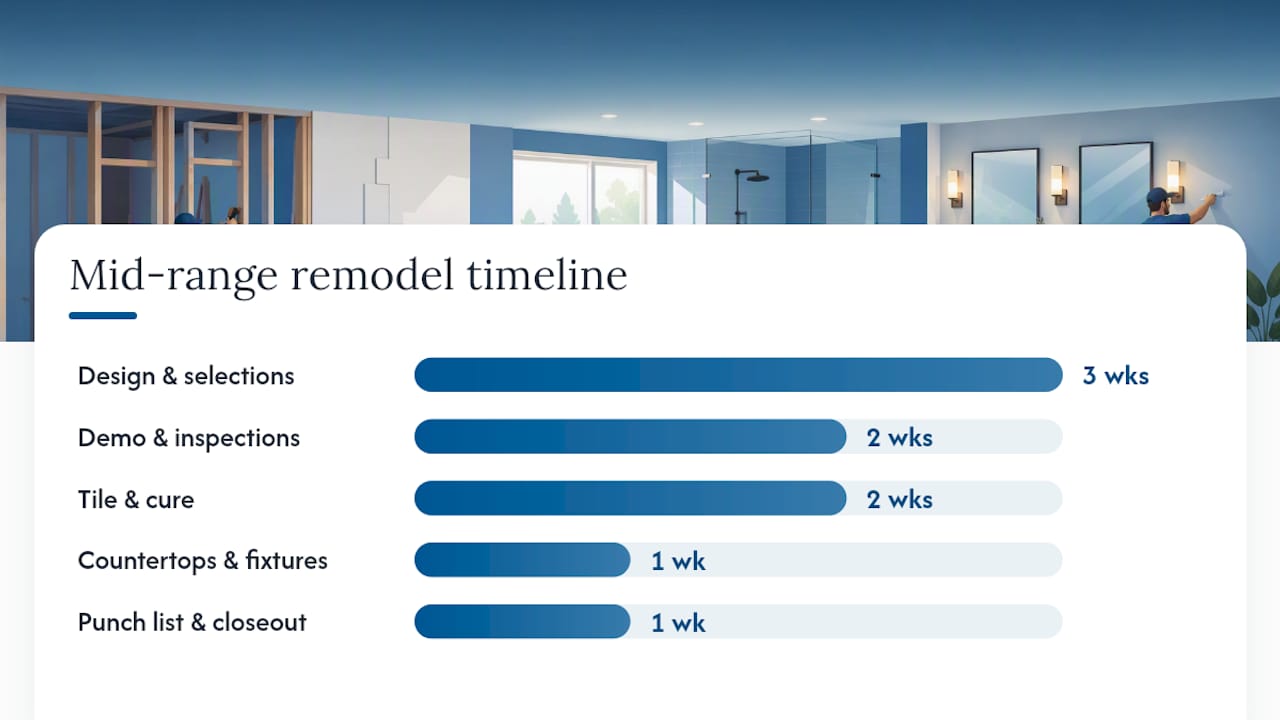
Total: roughly 8–10 weeks. This is the most common scope for a standard bathroom renovation schedule, and it aligns with the 3–6 weeks of active construction most industry guides report.
Full gut with layout changes (primary suite or complete reconfiguration)
Week | Activity |
Weeks 1–4 | Design, structural review, permit application, all material orders placed |
Weeks 5–6 | Demo, structural work if needed, rough plumbing and electrical |
Week 7 | Inspections, corrections if needed |
Weeks 8–9 | Waterproofing, backer board, tile installation |
Week 10 | Tile cure, countertop template, glass order confirmed |
Weeks 11–12 | Countertops, glass install, fixtures, finishes |
Weeks 13 and 14 | Punch list, final inspection, closeout |
Total: roughly 10–14 weeks on the optimistic end, up to 18 weeks if custom items or permit delays add time. This aligns with the full-remodel range documented by Thornapple Construction.
Print whichever schedule fits your scope, share it with your contractor on day one, and mark buffer days explicitly. A buffer of three to five days per phase is reasonable; a full week of buffer at the end of construction is not excessive for a gut remodel.
How to choose a contractor and what your contract should include
Interview questions that reveal scheduling discipline
Ask every contractor these questions before you sign:
What is your current backlog, and when can you realistically start?
Who is your tile setter, and are they on your crew or a subcontractor?
How do you handle permit pulls and inspection scheduling?
What happens to my project if a subcontractor is delayed?
Have you done projects in my municipality? How long do permits typically take here?
Can you provide a written week-by-week schedule before we sign?
Contract checklist
A solid contract protects your timeline as much as your budget. Require these clauses:
Written project schedule with start date, phase milestones, and projected completion
Payment schedule tied to milestones, not calendar dates (never pay more than 10–15% upfront)
Material responsibility clause specifying who orders what and who absorbs lead-time delays
Change-order process in writing, including how changes affect the schedule and price
Inspection responsibilities stating who schedules and attends each inspection
Warranty terms for labor and materials, with specific durations
Cleanup and site protection standards for daily and final cleanup
Red flags to watch for
Vague or verbal-only schedule (“we’ll get it done in about six weeks”)
No written milestones or payment tied to completion stages
Upfront deposit request above 15–20% of total contract value
Unwillingness to pull permits (“we can skip that for this scope”)
No references from projects in your county or municipality
Common delays and how to reduce their impact
Most bathroom renovation timeline overruns come from a short list of causes, and most of them are preventable with early action.
Material lead times. The most common schedule extender. Semi-custom vanities, specialty tile, and frameless glass all have multi-week lead times. Order before demo, not after.
Hidden water damage or mold. Mold and hidden water damage are common finds during demolition and can add days to several weeks for remediation before walls can close. A pre-demo moisture inspection reduces the surprise factor, even if it cannot eliminate it entirely.
Permit backlogs. Municipal permit offices vary widely. Some process applications in a week; others take three to four weeks. Submit early and follow up.
Change orders. Every scope change after construction starts adds time. Lock your selections before demo and resist the urge to upgrade mid-project.
Contractor backlog. A contractor who cannot start for eight weeks is not necessarily a red flag, but confirm their crew availability in writing before signing.
Inspection delays. Inspector availability is outside your contractor’s control, but scheduling inspections early in the week reduces the risk of a multi-day stall.
If you have only one bathroom, arrange your temporary access plan before demo day and confirm it in writing with your contractor.
Seasonal timing matters less for bathroom remodels than for exterior work, but it is not irrelevant. Contractor availability tightens in spring and early summer when demand peaks. Booking in fall or winter often means shorter lead times to start and more crew attention on your project.
How Coastal Home Renovations managed a real Suffolk County bathroom project
Coastal Home Renovations has handled bathroom remodeling in Suffolk County for over 20 years. Here is how a representative mid-range project unfolded:
Week 1: Discovery meeting and site walk; scope confirmed, selections process started
Weeks 2–3: Tile, vanity, and fixture selections finalized; permit application submitted; materials ordered
Week 4: Permit approved; demo scheduled
Weeks 5–6: Demo, rough plumbing and electrical, rough inspections passed
Weeks 7–8: Waterproofing, backer board, tile installation
Week 9: Tile cure, glass templated and ordered
Weeks 10–11: Glass installed, fixtures set, finishes completed
Week 12: Final walkthrough, punch list cleared, final inspection signed off
The 20+ years of local experience Coastal brings to Suffolk County projects means they know which municipalities move quickly on permits and which require extra lead time. That local knowledge alone can save a week or two on the front end of a project. Their completed project gallery shows the range of finishes and scopes they have handled across Long Island.
What most bathroom remodel guides get wrong about timelines
The conventional advice is to “plan for delays.” That framing is almost useless because it treats delay as inevitable and random, which it mostly is not. The majority of bathroom renovation timeline overruns trace back to two causes: materials ordered too late and homeowner decisions made too slowly. Both are entirely within the homeowner’s control before a single tile is set.
The second thing most guides underweight is the difference between a contractor’s schedule and a project’s schedule. A contractor can be perfectly on time with every trade and still deliver a bathroom three weeks late because the frameless glass was ordered to rough dimensions and had to be recut. The schedule the homeowner needs to manage is the material schedule, not just the construction calendar.
Third: the inspection sequence is treated as a formality in most guides. It is not. In many Suffolk County municipalities, a failed rough inspection means the crew stops, corrections are made, re-inspection is scheduled, and you lose three to five days minimum. Contractors who have worked locally for years know which inspectors are strict about which details. That local knowledge is worth more than any generic timeline calculator.
The practical upshot: lock your selections before you sign the contract, order everything the day selections are confirmed, and choose a contractor who has pulled permits in your specific municipality before. Those three decisions do more to protect your schedule than any contingency buffer.
Coastal Home Renovations keeps your project on schedule
Suffolk County homeowners who have tried to manage material orders, permit timelines, and subcontractor sequencing on their own know how quickly a well-planned project can slip. Coastal Home Renovations handles all of it as part of their standard service: permit applications, material coordination, crew scheduling, and weekly progress updates so you always know where your project stands.
With over 20 years of experience remodeling bathrooms across Long Island, Coastal brings local permit knowledge and established trade relationships that compress the pre-construction phase and keep construction moving. Their bathroom remodeling services in Suffolk County include a projected schedule after the initial site visit, so you have a real timeline in hand before any work begins. Browse their completed project gallery to see finished results across a range of scopes and budgets, then contact Coastal to schedule your consultation and get a written schedule for your project.
Sources
Recommended
Comments