
Hurricane-Proof Home Upgrades That Actually Work
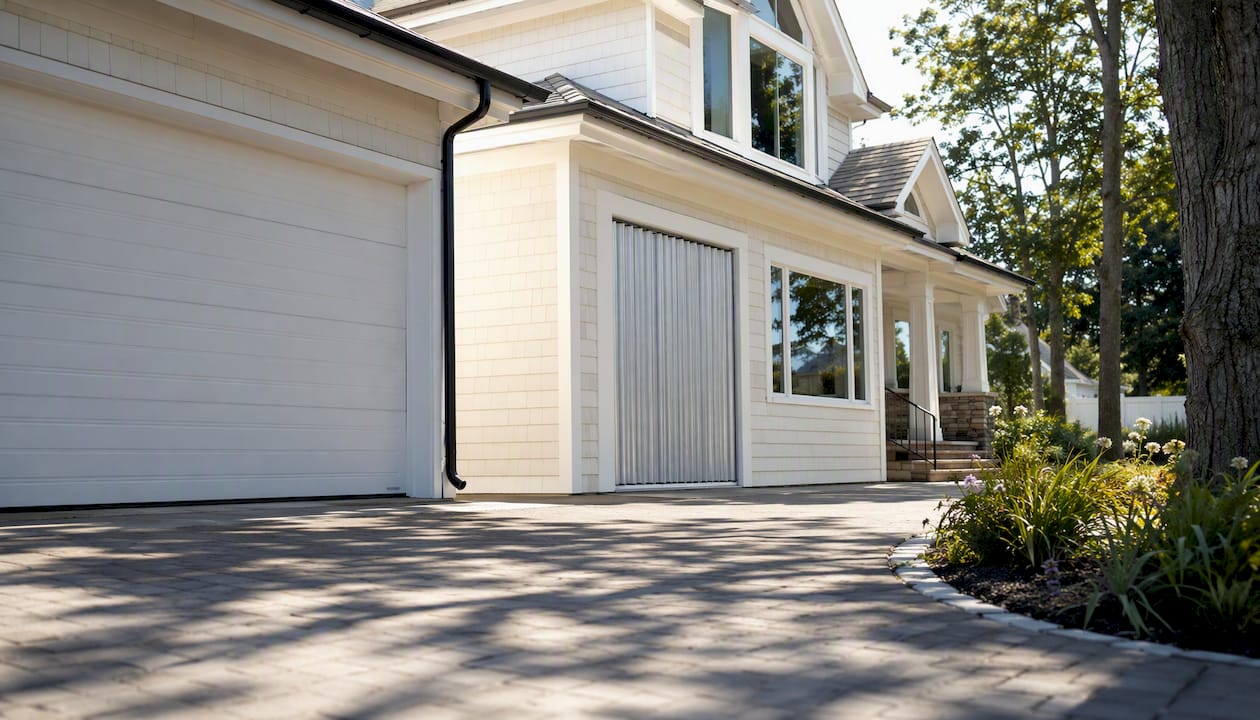
The highest-impact hurricane-proof home upgrades are, in order: protecting every opening (windows, doors, especially the garage door), reinforcing roof-to-wall connections with hurricane ties, improving roof deck fastening with ring-shank nails, sealing the roof deck against water intrusion, and adding structural sheathing or hold-downs to walls. Your single best first step is a walk-through of every opening and an attic inspection to see what connections you already have. FEMA’s building science guidance, the IBHS FORTIFIED Home standard, and FLASH (the Federal Alliance for Safe Homes) all point to the same priorities.
Here is what to focus on, ranked by impact per dollar:
Protect openings first. A breached window or door pressurizes the interior and pushes the roof off from inside. Impact glazing, approved shutters, or a combination of both stops this failure mode.
Reinforce roof-to-wall connections. Hurricane ties (clips) at every rafter-to-top-plate connection are among the most cost-effective structural retrofits available.
Upgrade or brace the garage door. The garage door is the largest single opening in most homes and the most common failure point in Category 2+ storms.
Improve roof deck fastening. Ring-shank nails and a tighter nailing pattern keep the deck attached when shingles are already gone.
Seal the roof deck. A secondary water-resistance layer limits interior damage even when the outer roof cover fails.
Reduce water intrusion at grade. Flood vents, proper grading, and resilient finishes on lower floors limit the damage that water does once it reaches the structure.
Pro Tip: Before spending a dollar on materials, pull your home’s permit history at the local building department. Homes built before the mid-1990s in coastal areas often lack the nailing schedules and connection hardware that post-Andrew codes require — knowing your baseline tells you exactly where to start.
Key Takeaways
Protecting openings, securing roof-to-wall connections, and upgrading the garage door deliver the highest hurricane resilience per dollar for most U.S. coastal homes.
Point | Details |
Protect openings first | Impact windows, approved shutters, or both stop interior pressurization — the leading cause of roof loss. |
Add hurricane ties immediately | Clips like the Simpson H2.5A raise uplift resistance 3–4x over toenailing and cost a fraction of a full re-roof. |
Upgrade the garage door | The largest opening in most homes is the most common catastrophic failure point in Category 2+ storms. |
Seal the roof deck at re-roof | A self-adhering membrane added at re-roof time limits interior water damage even when shingles are stripped. |
Coastalhrli for local execution | Coastal Home Renovations manages permits, product approvals, and installation for Suffolk County retrofit projects. |
Table of Contents
How do you protect windows, doors, and garage doors from hurricanes?
How do hurricane ties and roof sheathing upgrades protect your home?
Why does a continuous load path matter for your home’s structure?
Why do these upgrades work? The engineering behind the recommendations
How do you maintain hurricane upgrades after they are installed?
How do hurricane upgrades affect your homeowner’s insurance?
How do you protect windows, doors, and garage doors from hurricanes?
Opening protection is the single highest-leverage place to spend your retrofit budget. When a window or door fails during a storm, wind enters the structure and the interior pressure spikes. That spike pushes upward on the roof deck from the inside, compounding the uplift force the wind is already applying from the outside. Protecting every opening is as important as any structural upgrade.
Impact windows vs. shutters: which one is right for you?
Both impact-resistant glazing and approved hurricane shutters meet the same windborne-debris test standard when properly rated and installed. The choice comes down to convenience, budget, and your home’s situation.
Impact windows and doors are permanently in place. No deployment, no storage, no chance of forgetting to close them before a storm. They also tend to reduce noise and improve energy efficiency year-round. The tradeoff is cost: expect $800–$1,500 per window installed, with whole-house projects running $15,000–$40,000 or more depending on home size and frame material.
Accordion and roll-down shutters offer comparable protection at a lower per-opening cost and deploy in minutes. They require annual lubrication and testing to confirm they still close fully. Corrugated steel and aluminum panel shutters are the most affordable option ($10–$20 per square foot installed) but require storage space and manual labor before every storm.
Permits are required for both. Impact window installations typically require a product approval number, a Notice of Commencement in Florida, and a final inspection. Shutters need a permit in most coastal jurisdictions and must carry a product approval tied to the local design wind speed. Both upgrades commonly qualify for homeowner’s insurance mitigation credits — ask your insurer for a wind mitigation inspection after installation.
DIY boundary: Temporary plywood panels are a legal pre-storm measure in most jurisdictions and cost roughly $1–$2 per square foot in materials. Permanent impact glazing and motorized shutters require licensed contractors and engineered product approvals.
Pro Tip: When comparing impact windows vs. hurricane shutters for a whole-house project, get bids for both. In many cases, accordion shutters on large openings combined with impact glass on smaller fixed windows gives you the best protection-to-cost ratio.
Garage doors: the most common catastrophic failure point
Garage doors are the largest opening in most homes and the most frequent cause of full roof loss in Category 2 and stronger storms. When the door fails, the pressure surge is immediate and severe.
Options to address this:
Replace with a wind-rated door. A door rated to your local design wind speed (expressed as a Design Pressure or DP rating) is the most reliable fix. Wind-rated steel doors run $1,500–$4,000 installed for a standard two-car opening.
Add a horizontal bracing kit. For doors that are structurally sound but lack a wind rating, retrofit bracing kits ($200–$500 in materials, plus labor) add horizontal stiffeners that significantly reduce panel flex. These require professional installation to be effective.
Install a vertical support post. A floor-to-header post in the center bay of a wide door is a low-cost emergency measure, but it blocks vehicle access and is not a permanent solution.
Any permanent garage door upgrade requires a permit. The DP rating on the door must meet or exceed the local code wind speed — check with your building department or a licensed contractor.
Statistic: Hurricane ties like the Simpson H2.5A raise a rafter-to-top-plate uplift resistance from roughly 100–170 lbs with toenailing to roughly 390–700+ lbs depending on framing and fastener schedule, substantially improving connection strength per connection.
How do hurricane ties and roof sheathing upgrades protect your home?
The roof is the most expensive single component to replace after a storm, and it is also the one most likely to fail first. Two retrofit categories address this: the connections between the roof framing and the walls below, and the attachment of the roof deck itself.
Hurricane ties and clips
Hurricane ties (also called hurricane clips or straps) are metal connectors fastened between each rafter or truss and the top plate of the wall below. Without them, the only thing holding the roof down in many older homes is a handful of toenails. A single Simpson H2.5A clip raises that connection’s uplift resistance from roughly 100–170 lbs to 390–700+ lbs — a dramatic improvement for a connector that costs a few dollars per unit.
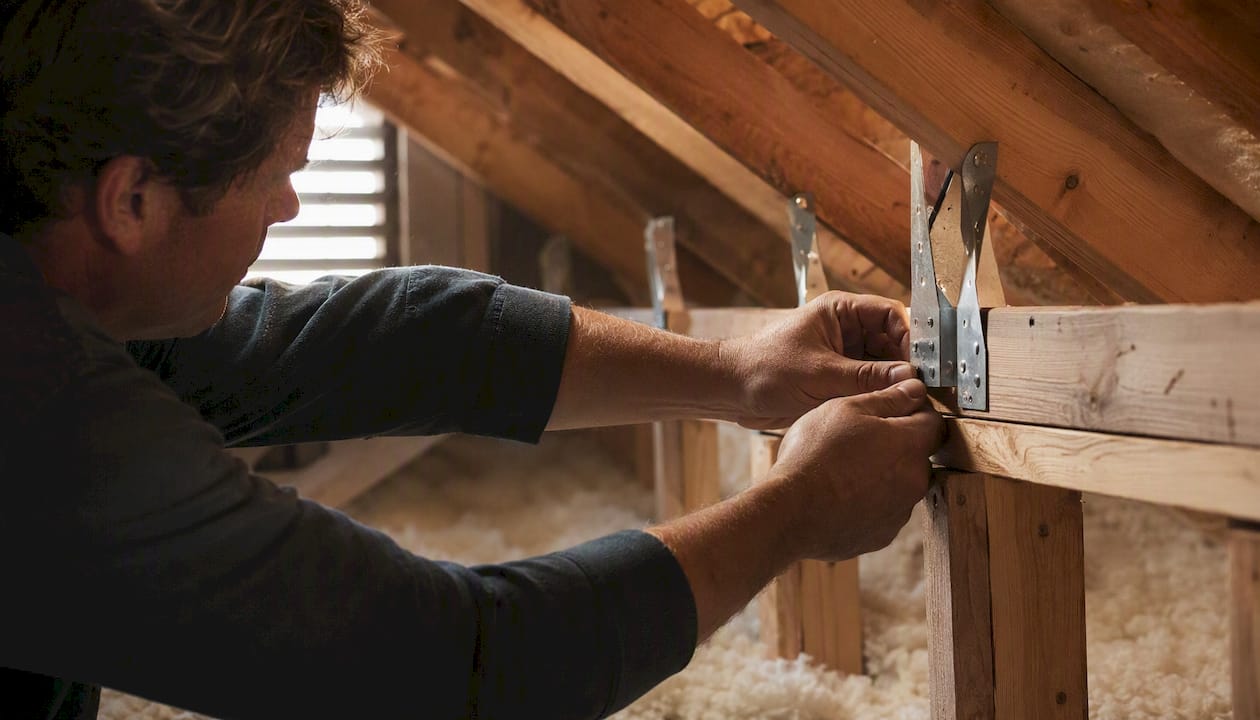
Installing clips requires attic access. A contractor or a capable DIYer with attic clearance can typically add clips to an accessible attic in one to two days. Homes with spray-foam insulation or very low roof pitches may require more invasive work. Budget $1,500–$4,000 for a professional installation on a typical single-story home, depending on truss spacing and attic accessibility.
Pro Tip: If your attic is accessible, bring a flashlight and look at the rafter-to-wall connections before calling anyone. If you see only toenails — no metal hardware — adding hurricane ties is your highest-priority structural retrofit.
Roof sheathing and the sealed deck
If your home was built before the mid-1990s, the sheathing is likely fastened with smooth-shank nails at 6-inch spacing — a schedule that fails well below the wind speeds a modern coastal home should survive.
A full re-nail of the roof deck from above requires removing the existing roofing material, which makes it most cost-effective to do at re-roof time. If you are replacing a roof anyway, specifying ring-shank nails at 4-inch spacing in the field and 3-inch spacing at edges and ends adds minimal cost but meaningfully raises the deck’s wind resistance.
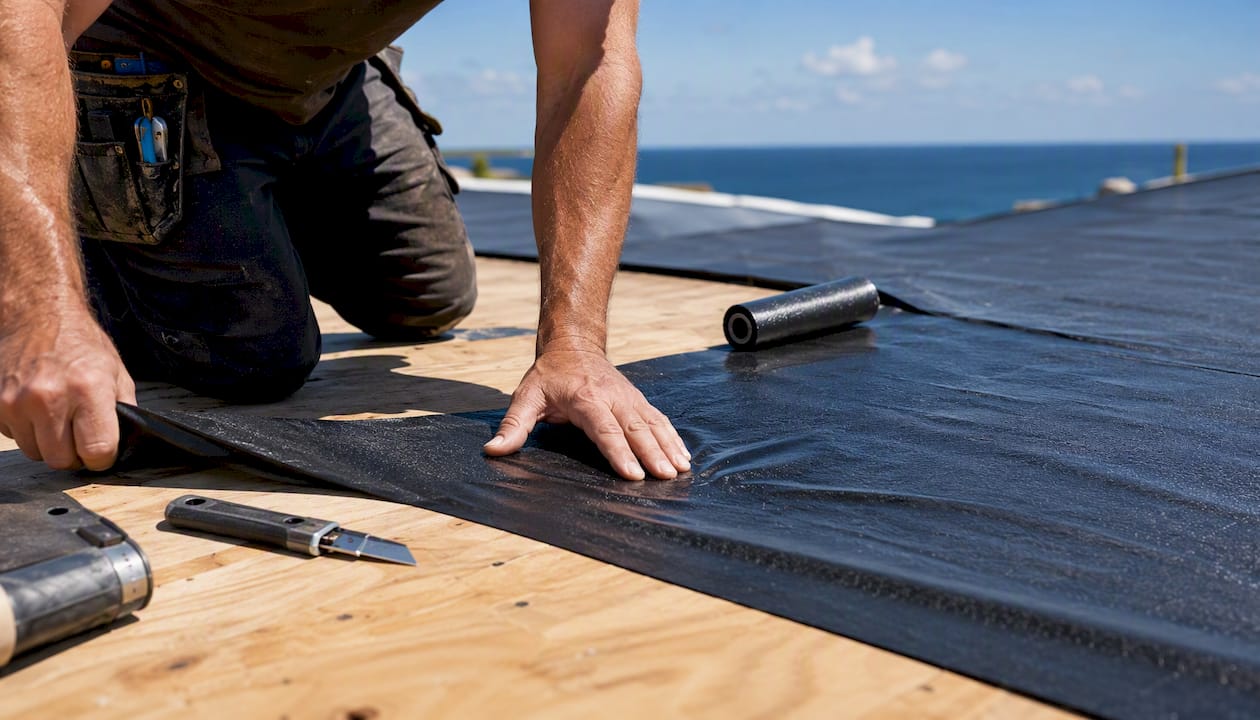
The sealed roof deck (a secondary water-resistance layer, typically a self-adhering modified bitumen membrane applied over the sheathing before the outer cover goes on) is the other critical element. When shingles blow off, a sealed deck keeps water out of the structure for hours or days. The FORTIFIED Home standard requires a sealed deck for its Roof designation.
When to re-roof vs. retrofit incrementally: If your roof is more than 15 years old, has visible deck issues, or is already scheduled for replacement, do the full package — ring-shank nails, sealed deck, and new clips if accessible. If the roof is newer and in good condition, adding hurricane ties in the attic and confirming the nailing schedule is the more cost-effective path.
Upgrade | Typical cost range | DIY possible? |
Hurricane ties (attic-accessible) | $1,500–$4,000 installed | Partial (accessible attics only) |
Re-nail roof deck (at re-roof) | $500–$1,500 added cost | No |
Sealed roof deck (at re-roof) | $1,000–$3,000 added cost | No |
Full re-roof with all upgrades | $15,000–$40,000 or more | No |
Why does a continuous load path matter for your home’s structure?
A continuous load path means the wind load on your roof transfers through connected hardware all the way down to the foundation — roof to rafters, rafters to top plate, top plate to studs, studs to sill plate, sill plate to foundation. Break any link in that chain and the structure fails at the weak point, regardless of how strong everything else is.
Practical retrofits that complete or strengthen the load path:
Structural sheathing on walls. Replacing non-structural sheathing (fiberboard, foam board) with OSB or plywood rated for shear loads stiffens the wall against racking. Cost: $3,000–$8,000 for a typical home, requires permits and usually a licensed contractor.
Wall hold-downs and anchor bolts. Metal hold-down hardware at wall corners and at shear wall boundaries ties the stud wall to the foundation. Retrofitting these in an existing home is invasive and typically requires a structural engineer’s design.
Gable-end bracing. Gable ends are the triangular wall sections at each end of a gable roof. They are often the least-braced part of the structure and among the first to fail. Diagonal bracing installed in the attic from the gable-end studs to the nearest interior truss is a relatively accessible retrofit. Cost: $500–$2,000 depending on attic access and gable height.
Tie-downs for manufactured or older homes. Older manufactured homes often lack adequate ground anchors. Retrofitting ground anchors and over-the-roof straps is a code requirement in many states for homes in wind zones.
When to call a structural engineer: any project that involves removing or modifying load-bearing walls, installing hold-downs in a slab-on-grade foundation, or designing a shear wall system in an existing home. Permit offices in most coastal counties will require engineered drawings for these scopes.
How do you stop water intrusion and reduce flood damage?
Wind damage gets the headlines, but water is what destroys interiors. A home that survives a storm structurally intact can still suffer $50,000 or more in interior damage from water intrusion through a failed roof, a breached door, or rising floodwater.
Secondary water resistance is the first line of defense. A self-adhering underlayment applied over the roof deck before the outer cover goes on keeps water out even when shingles are stripped. Properly flashed windows and doors — with continuous sill pan flashing and sealed rough openings — stop wind-driven rain from entering around frames.
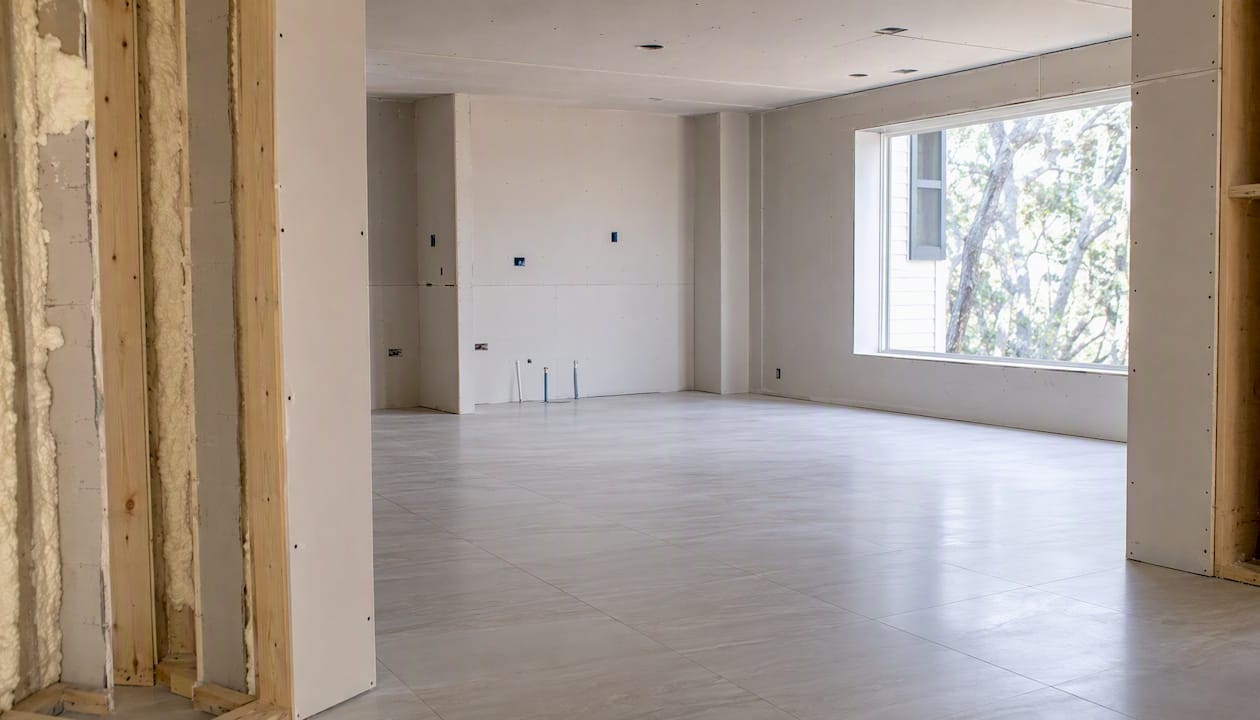
Flood-resilient finish materials on lower floors limit how much damage rising water causes. Concrete board, ceramic tile, closed-cell spray foam, and pressure-treated framing all tolerate brief submersion far better than standard drywall and wood framing. If you are renovating a basement or first floor in a flood zone, specifying these materials adds modest cost upfront and dramatically reduces restoration costs after a flood event. Coastalhrli’s interior renovation work in Suffolk County routinely incorporates these materials in coastal homes.
Flood vents and elevation address a different problem: hydrostatic pressure on foundation walls from standing water. Engineered flood vents (ICC/ANSI 24 compliant) allow water to equalize on both sides of a foundation wall, reducing the risk of structural failure. If your home sits in a FEMA Special Flood Hazard Area (Zone A or AE on the FEMA flood map), elevation is often the only long-term solution for repeated flood risk.
Additional measures worth the cost:
Sump pump with battery backup. A primary sump pump handles normal groundwater; a battery backup runs when power fails during a storm. Combined cost: $800–$2,500 installed.
Backflow prevention valves on sewer lines stop sewage from backing up into lower floors during storm surge. Cost: $200–$1,000 depending on pipe access.
Raised electrical panels and HVAC equipment. Moving these above the base flood elevation is a one-time cost that prevents the most expensive single-item losses in a flood.
One important distinction: flood risk is separate from wind risk on your insurance policy. A standard homeowner’s policy does not cover flood damage. Check FEMA’s flood maps and talk to your agent about a separate flood policy through the National Flood Insurance Program (NFIP) or a private carrier.
What landscape and site changes reduce storm damage?
The yard is part of the storm-protection system. Windborne debris from trees, unsecured furniture, and clogged gutters causes a surprising share of opening failures and interior water damage.
Trim or remove hazard trees. Any tree with a trunk diameter over 6 inches within striking distance of the house should be assessed by a certified arborist. Dead branches and co-dominant stems (two trunks of equal size) are the highest-risk features. Tree trimming costs $300–$1,500 per tree; removal runs $1,000–$5,000 depending on size and access.
Secure or store outdoor furniture. Patio furniture, grills, planters, and decorative items become projectiles at 75 mph. Store them inside or use rated tie-down straps before any storm.
Protect soffits and roof eaves. Soffits are a common wind-entry point. Vented aluminum soffits can be replaced with solid panels or reinforced with blocking in the attic to reduce the chance of wind peeling them back and entering the attic space.
Maintain gutters and extend downspouts. Clogged gutters overflow against the fascia and foundation. Downspout extensions should discharge at least 6 feet from the foundation. Cost: $150–$400 for a full gutter cleaning and downspout extension installation.
Grade the yard away from the foundation. The ground should slope away from the house at roughly 1 inch per foot for the first 6 feet. Regrading a small area costs $500–$2,000 and can meaningfully reduce basement water intrusion.
Pro Tip: Walk your property after every significant rainstorm, not just before hurricane season. Pooling water within 10 feet of the foundation is a drainage problem that will get dramatically worse in a storm — and it is usually fixable with a downspout extension or a small swale.
Seasonal maintenance checklist:
March/April: Trim trees, inspect roof from ground, clean gutters, test sump pump
June 1 (hurricane season start): Confirm shutters deploy fully, check garage door hardware, store loose outdoor items
After any named storm: Inspect roof, soffits, and all window/door seals for damage before the next event
What permits, costs, and contractor questions matter most?
Permit basics
Every permanent hurricane retrofit requires a permit in coastal jurisdictions. No exceptions. Unpermitted work voids insurance claims, creates liability at resale, and may be structurally unsafe. Your local building department sets the design wind speed (Vult) that all products must be rated to meet. In Suffolk County, NY, that figure varies by zone — confirm it before specifying any product.
When a structural engineer is required:
Hold-down and anchor bolt retrofits in existing foundations
Shear wall design in existing framing
Any structural modification to load-bearing elements
Gable-end bracing in complex roof geometries
Contractor hiring checklist
Verify the contractor’s state license and check for active complaints with your state licensing board.
Ask for proof of general liability and workers’ compensation insurance — get the certificate directly from the insurer.
Request documentation of prior FORTIFIED or wind-mitigation projects, including product approval numbers used.
Confirm they pull permits and handle inspections — never accept “we’ll skip the permit to save you money.”
Get at least three written bids with itemized scopes, product specifications, and DP ratings.
Check references from projects completed in the past 12 months, specifically in coastal or high-wind areas.
Red flags: vague warranties with no written terms, pressure to start before permits are issued, inability to provide a product approval number for impact windows or shutters, and any suggestion that the work does not require a permit.
Cost summary for common retrofits
Upgrade | Typical cost range | Typical timeline |
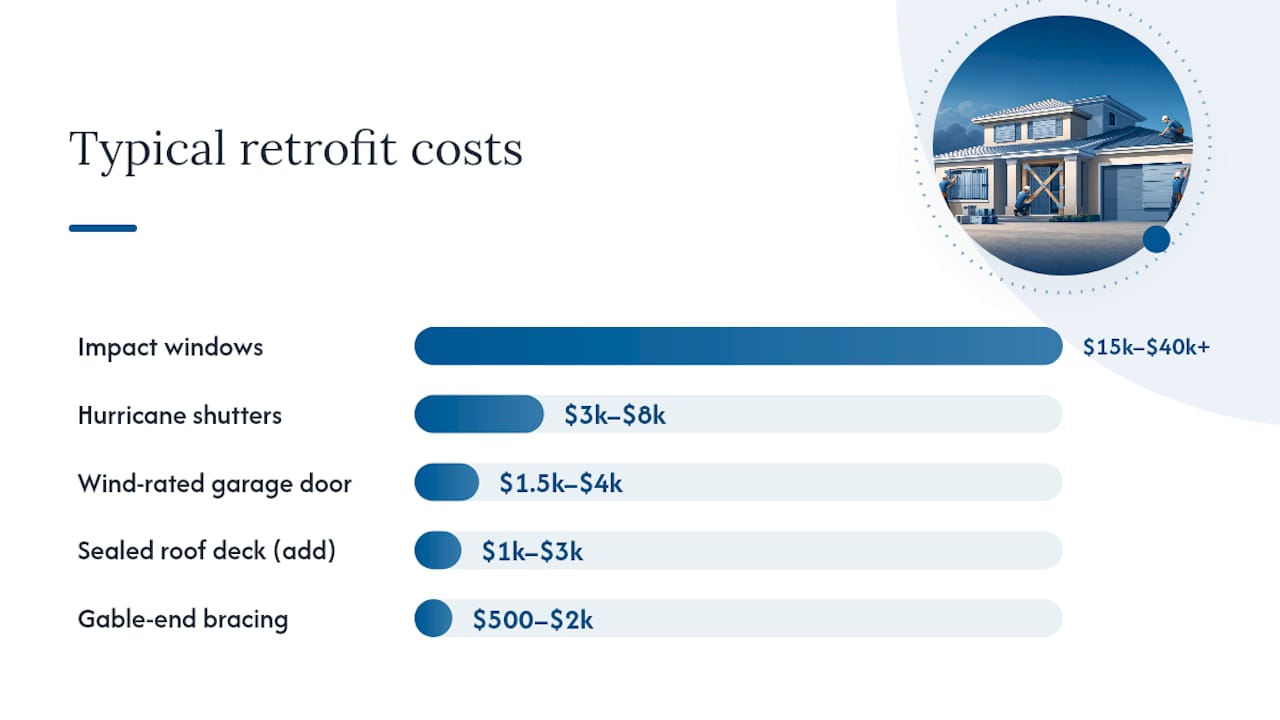
Impact windows (whole house) | $15,000–$40,000+ | 2–6 weeks |
Hurricane shutters (whole house) | $3,000–$8,000 | 1–3 weeks |
Wind-rated garage door | $1,500–$4,000 | 1–2 days |
Hurricane ties (attic retrofit) | $1,500–$4,000 | 1–2 days |
Sealed roof deck (at re-roof) | $1,000–$3,000 added | At re-roof |
Full re-roof with upgrades | $15,000–$40,000 or more | 1–3 weeks |
Gable-end bracing | $500–$2,000 | 1 day |
Sump pump with battery backup | $800–$2,500 | 1 day |
Why do these upgrades work? The engineering behind the recommendations
The physics of hurricane damage comes down to two mechanisms: pressurization and load-path failure.
When a window or door fails, wind enters the structure. Interior pressure spikes. That pressure pushes upward on the roof deck from the inside while wind is simultaneously pulling it upward from the outside. The combined load often exceeds what even well-fastened sheathing can resist. Protecting openings is not just about keeping rain out — it is about keeping the roof on.
The continuous load path principle addresses the second mechanism. Wind load on the roof must transfer through every connection in sequence — roof deck to rafters, rafters to top plate, top plate to studs, studs to foundation — without any link failing. A single weak connection (a toenailed rafter with no clip, an unanchored sill plate) concentrates stress and fails first, often taking the entire roof section with it.
The FORTIFIED Home standard translates these principles into prescriptive, testable requirements: sealed roof decks, DP-rated openings, ring-shank nailing patterns, and verified connections. Homes built or retrofitted to FORTIFIED specifications have consistently performed better in post-storm damage surveys than comparable homes built only to minimum code.
An MIT analysis estimated that stronger roof-to-wall connections and tighter nailing patterns could save billions of dollars annually in wind-damage costs across the U.S. housing stock. The per-home cost of those retrofits is a fraction of what a single storm event costs in repairs.
How do you maintain hurricane upgrades after they are installed?
Installing hurricane hardware is not a one-time task. Connections corrode, shutters bind, and sealed membranes develop gaps — especially in the salt-air environment of Long Island’s South Shore and barrier islands.
Annual inspection checklist:
Hurricane ties and clips: Check accessible attic connections for rust or loose fasteners. Galvanized hardware in coastal environments should be inspected every year and replaced when corrosion is visible.
Impact windows and doors: Test every lock and latch. Inspect the glazing for chips or cracks at the edges — a compromised edge seal reduces the impact rating. Check weatherstripping for compression and replace if it no longer seals fully.
Shutters: Deploy every shutter or roll-down fully at least once per year (before hurricane season is ideal). Lubricate tracks and hinges with a silicone-based lubricant. Confirm that all locking pins engage.
Garage door: Test the door’s wind-rated bracing hardware for tightness. Check bottom seals and side seals for gaps. If the door has a retrofit bracing kit, verify that all bolts are torqued to spec.
Roof and sealed deck: After any storm with sustained winds above 50 mph, have a licensed roofer inspect the roof deck for lifted sheathing, missing fasteners, or membrane separation at seams.
Sump pump: Test monthly by pouring water into the pit. Replace the battery backup every 3–5 years regardless of apparent condition.
One often-overlooked maintenance item: the attic itself. Attic ventilation that was modified during a retrofit can create condensation problems if not properly balanced. Check for moisture staining on sheathing or insulation at least once per year.
How do hurricane upgrades affect your homeowner’s insurance?
The financial case for storm-hardening upgrades is not just about avoiding repair costs. In many coastal states, documented wind mitigation measures directly reduce insurance premiums, sometimes substantially.
Wind mitigation inspections are the mechanism. A licensed inspector (in Florida, a certified wind mitigation inspector; in New York, typically a licensed engineer or home inspector) documents your home’s construction features: roof shape, roof deck attachment, roof covering, opening protection, and roof-to-wall connections. The resulting report goes to your insurer, who applies credits based on what the inspection finds.
The credits vary by state and insurer, but the pattern is consistent: homes with impact windows or approved shutters, hurricane ties at every connection, and a sealed roof deck receive meaningfully lower premiums than comparable homes without those features. In Florida, the savings can offset the cost of the upgrades within a few years. New York’s credit structure is less standardized, but insurers writing coastal policies increasingly price wind mitigation features into their underwriting.
What to do:
Complete the upgrades and get the final permit inspection signed off.
Schedule a wind mitigation inspection immediately after.
Submit the report to your insurer and ask for a re-rate.
If your current insurer does not offer credits, shop the market — carriers writing coastal policies in New York vary significantly in how they price mitigation.
One critical point: flood damage is not covered by a standard homeowner’s policy, regardless of how well-hardened your home is against wind. If your property is in a FEMA Special Flood Hazard Area, a separate flood policy through the NFIP or a private carrier is not optional — it is the only way to cover that risk.
An editorial perspective on what actually moves the needle
The most common mistake homeowners make when planning hurricane retrofits is spending money in the wrong order. They replace windows first because windows are visible and feel like a meaningful upgrade. Meanwhile, the garage door is unrated, the attic has no hurricane ties, and the roof deck is fastened with smooth-shank nails at 6-inch spacing.
That sequencing is backwards. A breached garage door pressurizes the house faster than almost any other single failure. Hurricane ties cost a few dollars each and can be installed in a day. Ring-shank nails at re-roof time add a few hundred dollars to a project that costs tens of thousands anyway. These are the upgrades that keep the structure standing. Impact windows matter enormously — but they matter most when the rest of the envelope is already secured.
The second mistake is treating “hurricane-proof” as a binary. No home is proof against a direct hit from a major hurricane. The goal is to move your home from the category of “likely catastrophic failure” to “likely survivable with manageable damage.” That shift is achievable for most homes with a focused retrofit budget of $10,000–$25,000 applied in the right sequence.
For Suffolk County homeowners specifically: the combination of nor’easters, tropical systems, and the occasional direct hurricane track means the threat is not hypothetical. The South Shore barrier islands and the bays behind them create storm surge exposure that wind mitigation alone cannot address. Know your flood zone, carry flood insurance, and plan for evacuation in surge zones — no amount of structural hardening makes a home in a surge zone safe to shelter in place during a major storm.
Coastal Home Renovations handles the retrofit work for you
Suffolk County homeowners dealing with the complexity of permits, product approvals, and contractor coordination have a direct option: Coastal Home Renovations manages the full retrofit scope from initial inspection through final permit sign-off.
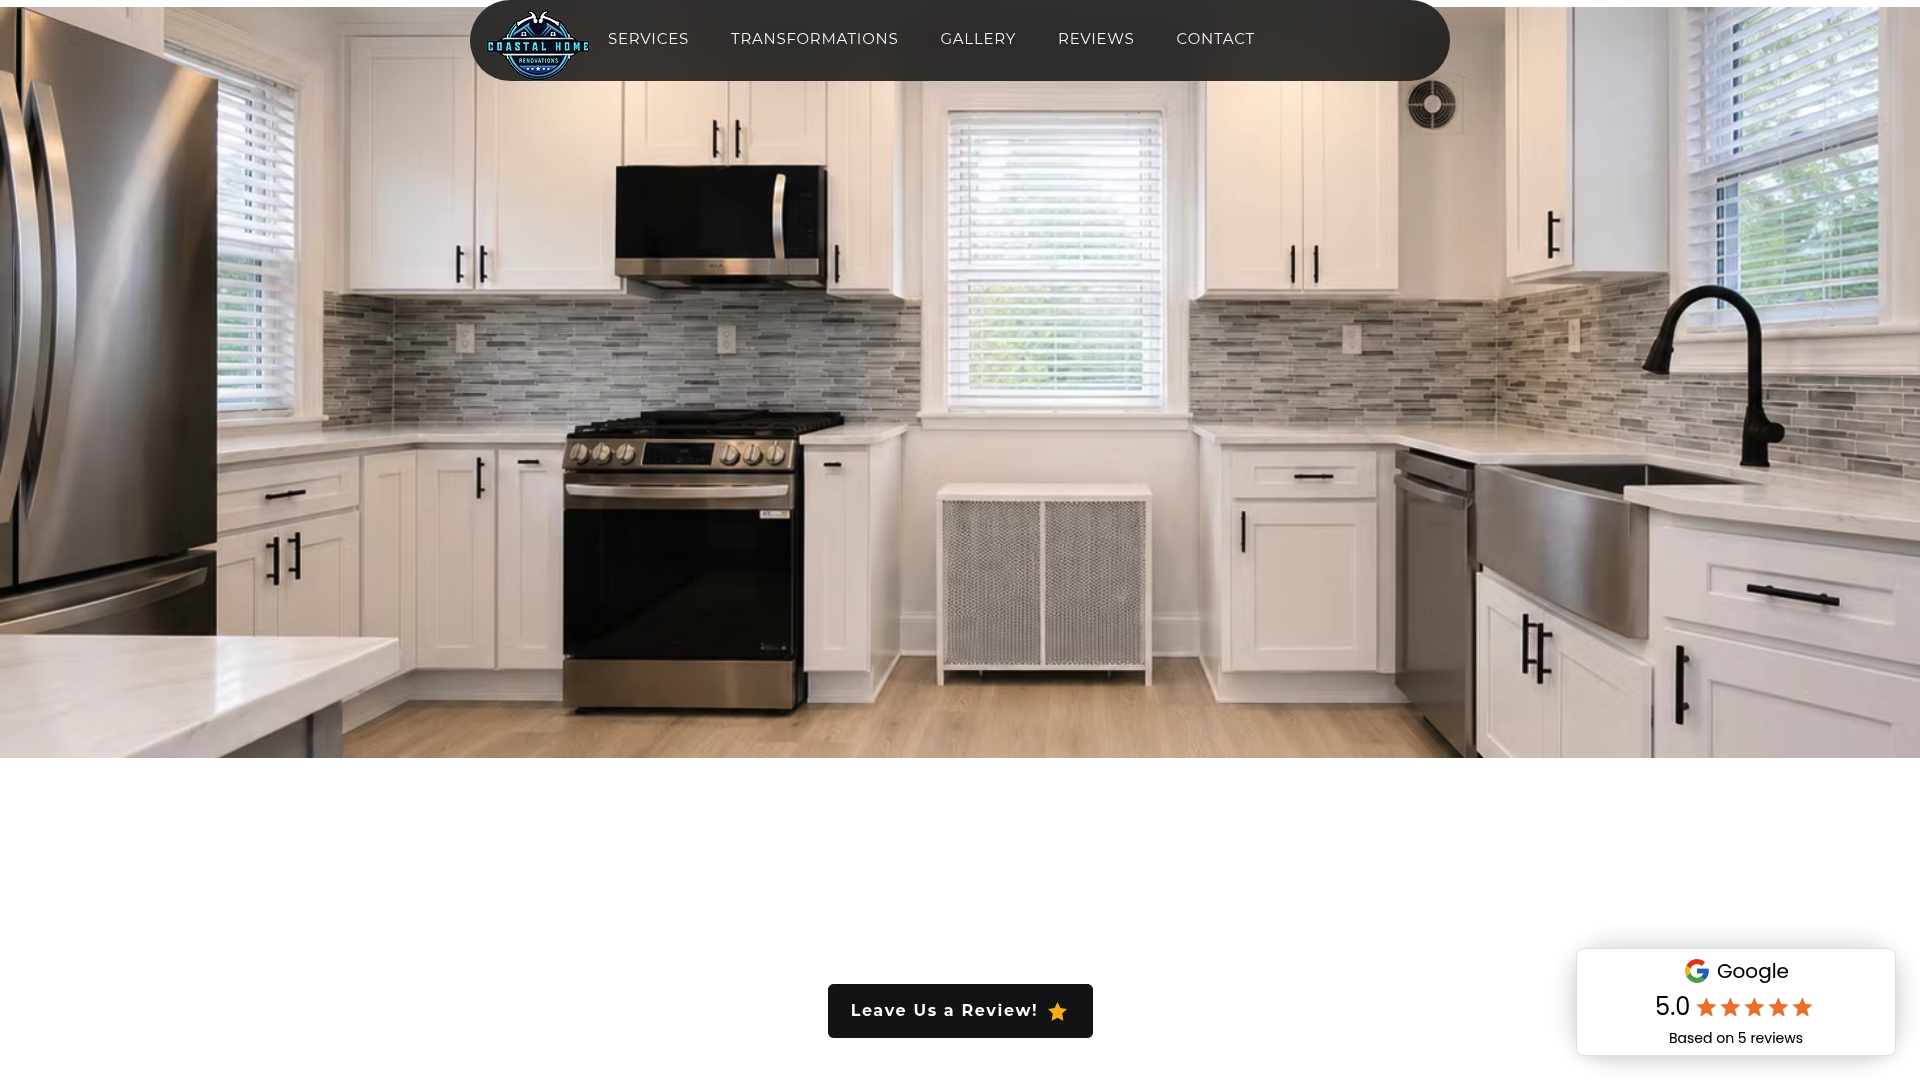
Coastalhrli brings over 20 years of experience working in Long Island’s coastal conditions, including familiarity with Suffolk County’s building department permit process, local design wind speed requirements, and insurance restoration work. The team handles roof reinforcement, impact window and door installation coordination, wind-rated garage door replacement, structural tie installation, and flood-resistant interior finishes — all under one contract, with transparent timelines and no subcontractor surprises.
An initial on-site inspection scopes the work, identifies the highest-priority gaps, and produces a written estimate with product specifications and DP ratings. Most retrofit packages are completed within two to six weeks depending on scope and permit timing. To schedule an inspection and get a written estimate, contact Coastalhrli directly through the services page.
Sources
These are the primary references behind the recommendations in this guide:
Recommended
Comments