
Kitchen Remodel Mistakes: 12 Fixes Every Homeowner Needs

Most costly kitchen remodel mistakes trace back to one root cause: decisions made before the planning is actually done. Fix these six first, and you’ll sidestep the errors that force expensive rework after cabinets are already installed:
Skipping electrical and plumbing verification before ordering appliances (new ranges, dishwashers, and refrigerators often need dedicated circuits your current wiring can’t support)
Ignoring layout and workflow by placing the fridge, sink, and stove too far apart or blocking natural traffic paths
Measuring wrong or not at all — a 1–2 inch discrepancy between an appliance and its cabinet opening can mean a full reorder
Under-planning lighting and ending up with a single overhead fixture that casts shadows across every prep surface
Wasting storage potential by defaulting to lower cabinets when drawers and ceiling-height cabinetry would serve you far better
Hiring the wrong contractor — no written contract, no permit plan, no references checked
Key Takeaways
Avoiding the most expensive kitchen remodel mistakes comes down to three disciplines: verify services before purchasing, finalize measurements before ordering, and sign a detailed contract before any demo begins.
Point | Details |
Verify electrical and plumbing first | Have licensed trades confirm circuits and drain locations before ordering any appliance. |
Measure appliances before cabinets | A 1–2 inch mismatch between an appliance and its cabinet opening forces costly rework. |
Budget a 15–20% contingency | Hidden conditions behind walls appear in nearly every gut renovation — keep that reserve liquid. |
Plan three lighting layers | Ambient, task, and accent lighting must be specified before walls close, not after cabinets are set. |
Coastalhrli’s approach | Coastal Home Renovations handles permit coordination, appliance verification, and licensed subcontractors for every Suffolk County kitchen project. |
Table of Contents
Why planning and budget decisions make or break your renovation
What electrical and plumbing work does a kitchen remodel require?
A 12-step pre-construction checklist to stop the biggest mistakes
What do contractors and designers say goes wrong most often?
Coastal Home Renovations: kitchen remodeling done right in Suffolk County
What are the most common kitchen remodel mistakes to avoid?
The list below is ranked by how much each mistake typically costs to fix after the fact. Catching any of these early is worth real money.
Not verifying electrical and plumbing before purchasing appliances. Modern high-performance appliances often require different voltage, amperage, and circuit sizes than legacy wiring can handle. Fix: have a licensed electrician and plumber review your appliance specs before you buy anything.
Designing around aesthetics instead of workflow. A kitchen that looks stunning in photos but forces you to walk ten steps between the stove and sink wears on you fast. Fix: design around workflow zones, grouping appliances and storage by task.
Skipping permits and inspections. Unpermitted electrical, plumbing, or structural work can block a home sale and require expensive tear-out to pass inspection later. Fix: pull every required permit before demo begins.
Ordering cabinets before finalizing appliance dimensions. Even a one-inch mismatch between a built-in microwave and its cabinet opening can force a costly adjustment. Fix: select and measure every appliance, including small built-ins, before cabinet specs are finalized.
Setting a budget with no contingency. Hidden conditions behind walls — old wiring, water damage, subfloor rot — appear in nearly every gut renovation. Fix: reserve 15–20% of your total budget for surprises.
Choosing finishes for looks alone. Honed marble countertops stain. Light-colored grout on a busy floor is a maintenance nightmare. Fix: evaluate every surface for durability and cleaning requirements before you commit.
Under-lighting the kitchen. One overhead fixture leaves shadows on counters and inside cabinets. Fix: plan three lighting layers — ambient, task, and accent — from the start.
Ignoring storage during the design phase. Counters fill up fast when there’s nowhere else to put things. Fix: specify interior organizers, drawer inserts, and pantry pull-outs at the time of ordering, not after.
Oversizing the island. An island that looks proportional in a showroom can block traffic flow entirely in your actual kitchen. Fix: tape out the island footprint on your floor and walk around it before committing.
Ripping out the old kitchen too early. Tearing out cabinets and appliances weeks before materials arrive leaves you without a functioning kitchen and paying for temporary solutions. Fix: keep the old kitchen operational until trades and materials are confirmed and on-site.
Hiring on price alone. The lowest bid often reflects missing scope, unlicensed work, or cut-rate materials. Fix: get three bids, check references, and verify licensing and insurance before signing.
Forgetting about resale. Hyper-personalized finishes and layouts can narrow your buyer pool. Fix: balance personal style with broadly appealing choices, especially for countertops and flooring.
Why planning and budget decisions make or break your renovation
Start with a written scope of work before you talk to a single contractor. Vague plans produce vague bids, and vague bids produce change orders. A clear scope means every contractor is pricing the same job, which makes bids comparable and disputes less likely.
Budget structure matters as much as the total number. That contingency isn’t padding — it’s where you pay for the water-damaged subfloor nobody saw coming, or the panel upgrade the electrician flags on day one.
Permits are non-negotiable for electrical, plumbing, and structural work. Skipping them to save time is one of the most expensive kitchen renovation mistakes to avoid: unpermitted work can void homeowner’s insurance, stall a sale, and require demolition to correct.
Typical phase durations to plan around:
Demo: 1–3 days for a standard kitchen
Rough-in (electrical, plumbing, HVAC): 3–7 days, depending on scope
Cabinetry installation: 2–5 days
Countertop templating and fabrication: 1–3 weeks after cabinets are set
Tile, flooring, and finishes: 3–7 days
Punch list and final inspections: 3–5 days
Pro Tip: Allocate contingency money specifically toward hidden services (old wiring, corroded pipes), not appliance upgrades. Upgrades are a choice; emergency rework is not.
How does kitchen layout affect daily function?
Layout is the one decision that’s nearly impossible to fix cheaply after the fact. Get it wrong and you’re living with it for the next decade.
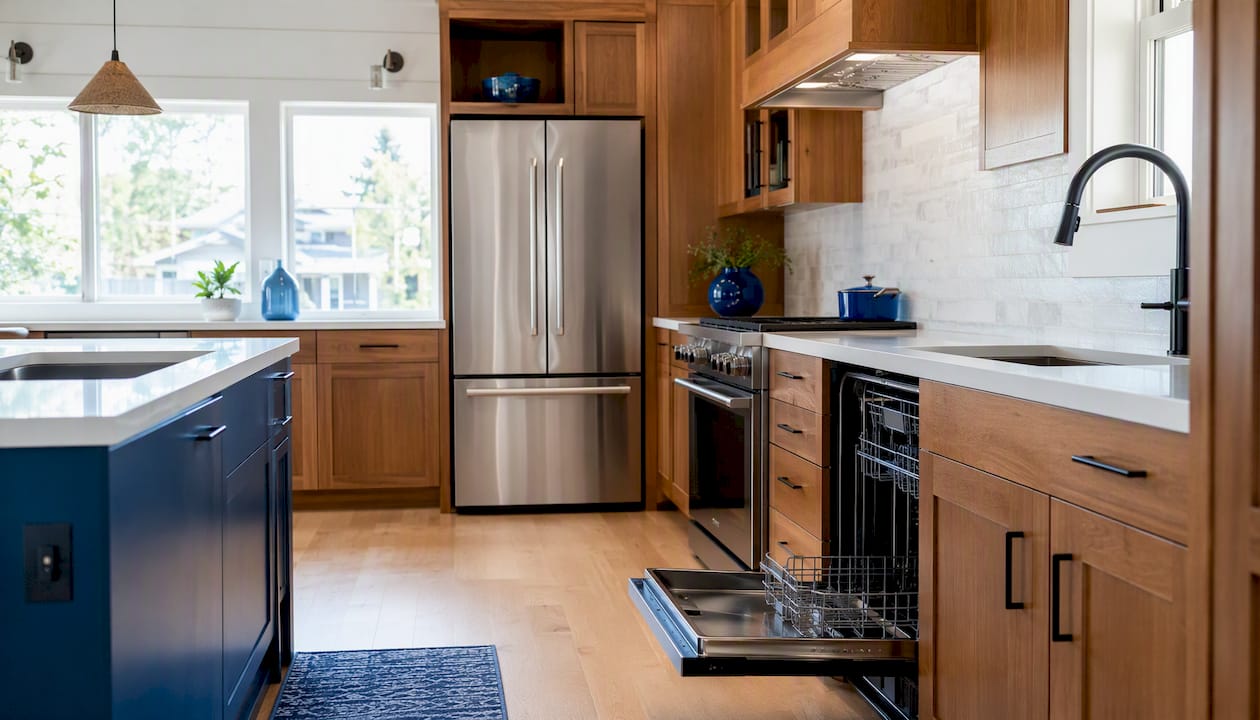
The classic work triangle — refrigerator, sink, stove — still holds up as a baseline, but modern kitchens often benefit from a zone-based approach instead: a prep zone, a cooking zone, a cleanup zone, and a storage zone. Each zone should be self-contained enough that two people can work simultaneously without colliding.
Minimum clearances to measure before finalizing your layout:
42 inches between facing countertops in a single-cook kitchen
48 inches for two-cook households
36 inches of clearance around an island on all sides (42–48 inches preferred for seating)
15 inches of landing space on each side of the range
18 inches of landing space beside the refrigerator
Island sizing is where kitchen design mistakes show up most visibly. An island that’s too large blocks the refrigerator door, cuts off the dishwasher path, or eliminates the clearance needed to open the oven fully. A standard overhang for seating is 12 inches for bar stools; 15–18 inches if you want knee clearance for comfortable sitting.
Pro tip for appliance placement: put the refrigerator at the perimeter of the work zone, not in the middle of it. Family members grabbing a snack shouldn’t have to cut through your prep area to reach it.
Pro Tip: Measure door swings and appliance door clearances before finalizing cabinet placement. A refrigerator door that opens into a cabinet or a dishwasher door that blocks the walkway is a daily frustration that a tape measure could have prevented.
Are drawers or cabinets better for kitchen storage?
Drawers win for lower-cabinet storage in most kitchens. You can see everything at a glance, pull items from the back without crouching, and organize by depth rather than by stacking. Three deep drawers where a two-door base cabinet would go is one of the highest-value swaps in a kitchen remodel.
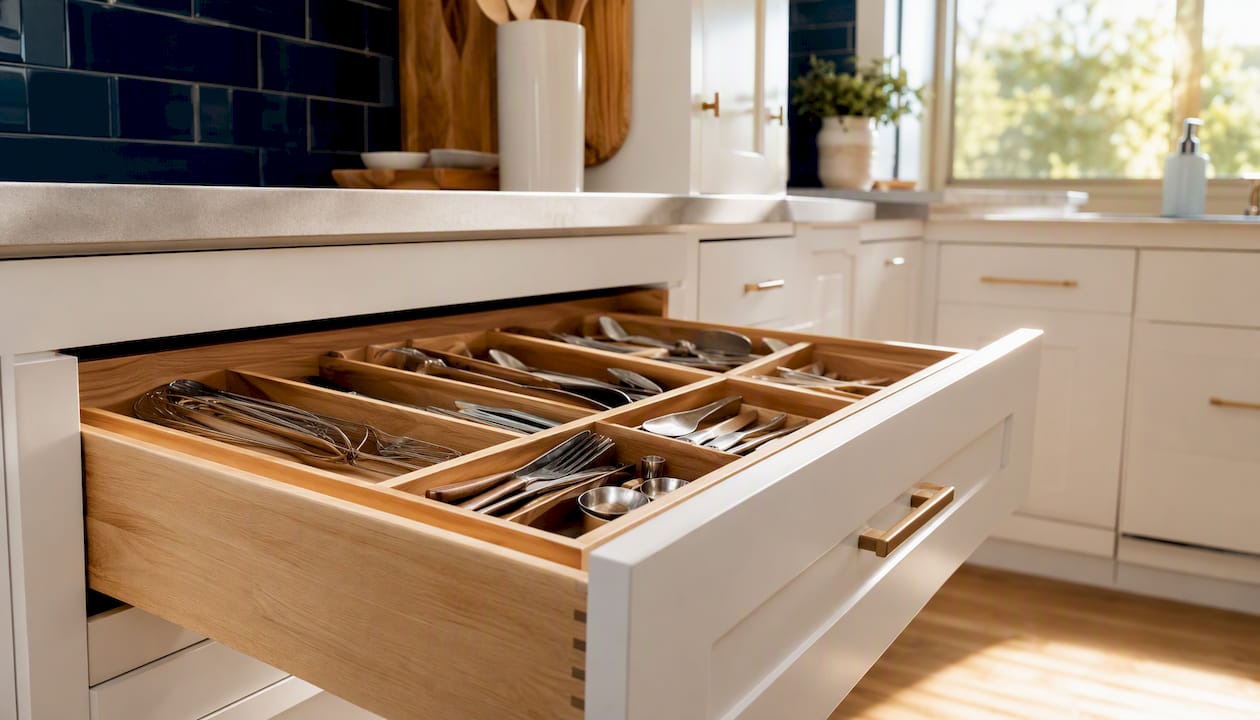
That said, lower cabinets still make sense for large pots, stand mixers, and trash pull-outs. The key is being deliberate about which items go where rather than defaulting to whatever the cabinet layout shows in the showroom.
Storage decisions that pay off:
Extend cabinetry to the ceiling to gain significant vertical storage and eliminate the dust-collecting gap above cabinets
Specify interior organizers (drawer dividers, pull-out shelves, spice inserts) at the time of ordering — retrofitting them later costs more and often doesn’t fit as cleanly
Plan an appliance garage or dedicated charging drawer if you use countertop appliances daily; keeping them accessible but hidden frees up prep space
Group storage by task: cutlery near the dishwasher, spices and oils near the stove, baking supplies near the mixer outlet
Incorporating accessibility features like drawers instead of lower cabinets is also significantly more cost-effective when done during the remodel than as a retrofit later. A pull-out shelf added during construction costs a fraction of what it costs to modify a finished cabinet.
Pro Tip: Specify the exact interior organizer model numbers in your cabinet order. “Add drawer inserts” as a verbal instruction often results in generic inserts that don’t fit your actual items.
What electrical and plumbing work does a kitchen remodel require?
This is the section most homeowners underestimate, and it’s where the biggest surprise costs hide. Failing to update electrical and plumbing to meet modern appliance requirements is one of the most frequent and expensive errors in any kitchen renovation.
Electrical checklist:
Dedicated 20-amp circuits for the refrigerator, dishwasher, and microwave
Dedicated circuit for the range or cooktop (often 240V for electric models)
GFCI protection on all countertop outlets within 6 feet of a sink (required by NEC code)
AFCI protection per your local code requirements
Outlets on the island: plan for at least two, with pop-up or in-counter receptacles if the island design doesn’t allow standard wall placement
USB/USB-C charging outlets if you want integrated device charging
Plumbing checklist:
Verify drain location if the sink is moving — relocating a drain in a slab foundation is a major cost
Confirm supply line locations for the dishwasher and any pot-filler addition
Check venting for the range hood: exterior venting is always preferable to recirculating, and duct routing needs to be planned before walls close
Island plumbing requires a drain run under the floor — confirm feasibility and cost before committing to a sink in the island
Questions to ask your contractor before signing:
What amperage is the current panel, and can it support the new appliance load?
Which circuits are dedicated, and which are shared?
Is the range hood vented to the exterior, and what’s the duct path?
Will the plumbing changes require opening the floor or the ceiling below?
A licensed electrician and plumber should review your appliance specs and the existing service before you purchase anything. Discovering that your panel needs an upgrade after the cabinets are installed is an expensive sequence of events.
How do you get kitchen lighting and finishes right?
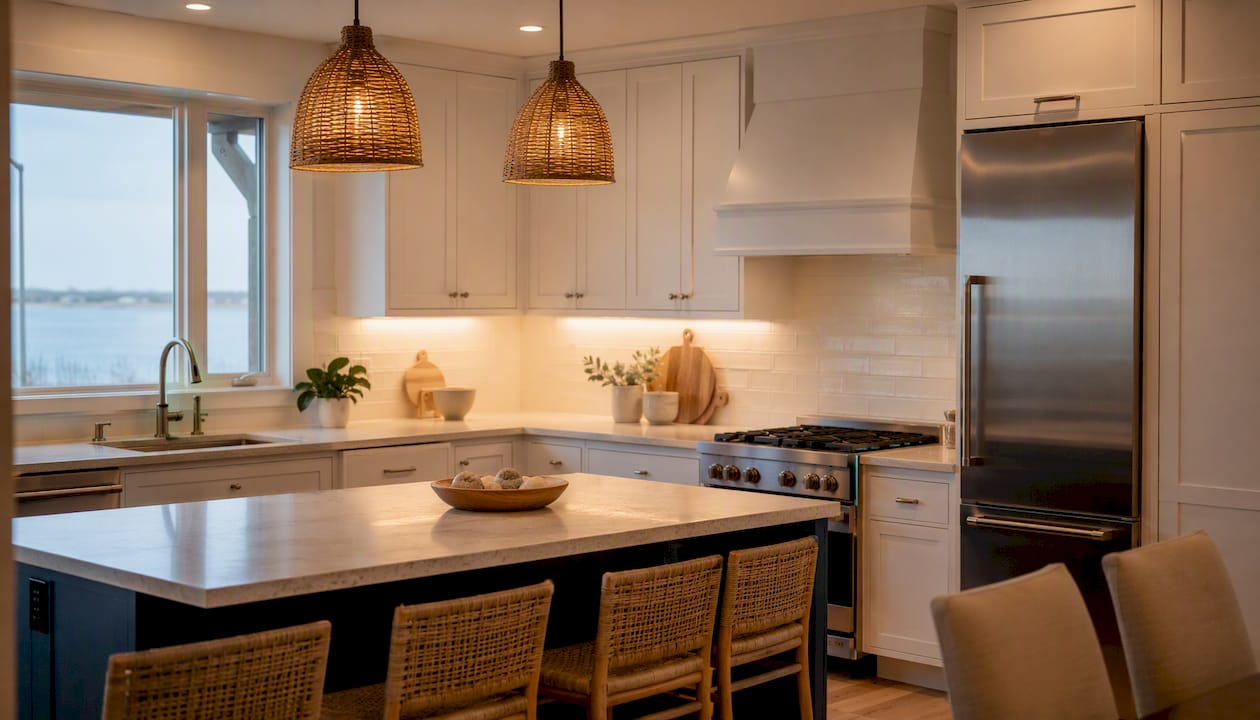
Lighting is the finish detail most homeowners get wrong by doing too little of it. A single overhead fixture — even a beautiful one — creates shadows on every vertical surface and leaves countertops dim. The fix is three layers, planned from the start.
The three lighting layers:
Ambient: general overhead lighting (recessed cans, a flush-mount fixture) that illuminates the whole room
Task: under-cabinet lighting directly above prep surfaces, pendant lights over an island or peninsula
Accent: toe-kick lighting, interior cabinet lighting, or a statement fixture over the dining area
Pendant sizing is a common trap. A pendant that looks right in a catalog photo can dwarf a small island or disappear above a large one. The standard rule: pendants should hang 30–36 inches above the countertop and be spaced roughly 24–30 inches apart. For an island under 4 feet wide, one pendant is usually enough.
Beginning with layered lighting from the planning stage — not as an afterthought once cabinets are set — prevents the need to add circuits or relocate fixtures later.
Surface material comparison:
Install flooring after cabinetry when possible. This allows natural movement of the floor material and reduces damage during cabinet installation — a sequencing detail that matters especially for hardwood and LVP.
How do you hire and manage a kitchen contractor?
The contract is your protection. A handshake agreement or a one-page estimate is not a contract. Before any work begins, your written agreement should include:
Detailed scope of work — specific materials, brands, and model numbers where applicable
Payment schedule tied to milestones, not to calendar dates
Change-order process in writing: any scope change requires a signed change order with a cost and timeline impact before work proceeds
Warranty terms for both labor and materials
Permit responsibility — who pulls them, who pays for them, who schedules inspections
Red flags to watch for:
A bid that’s significantly lower than the others without a clear explanation of what’s excluded
Requests for large upfront payments (more than 10–15% before work starts)
No physical address, no verifiable license number, no insurance certificate
Vague scope language like “kitchen renovation per plan” with no itemized breakdown
Pressure to start immediately without time to review the contract
Reference questions worth asking:
Did the project finish within the original timeline and budget?
How were change orders handled?
Would you hire this contractor again?
Keep a written record of every conversation. A quick email summary after a site meeting (“Per our conversation today, the countertop template is scheduled for Tuesday”) creates a paper trail that resolves disputes before they escalate. Establish a weekly check-in cadence and confirm that your contractor will notify you before any scope change is made, not after.
Should you plan for accessibility during a kitchen remodel?
Yes — and the earlier, the better. Accessibility features added during a remodel cost a fraction of what they cost as retrofits. A pull-out shelf in a base cabinet, lever-style hardware instead of knobs, and a lower section of countertop for seated work are all decisions that cost little when they’re part of the original plan.
Cost-effective accessibility features to include from the start:
Drawers instead of lower cabinets (easier reach, no bending)
Lever handles on all cabinets and faucets
A section of countertop at 32–34 inches height (standard is 36 inches) for seated or low-reach use
Pull-out shelves in pantry and base cabinets
Touchless or single-handle faucets
Wider aisles (42–48 inches) to accommodate mobility aids if needed now or in the future
These features also appeal to a broad range of buyers, which means they support resale value rather than limiting it. For homeowners in Suffolk County interested in ADA-compliant modifications, planning these details during the kitchen remodel avoids the disruption and cost of a separate accessibility project later.
A 12-step pre-construction checklist to stop the biggest mistakes
Run through this before signing any contract or ordering any material.
Measure every appliance (width, depth, height) and confirm cabinet openings match, with clearance for ventilation.
Finalize the layout and tape it out on the floor — walk through it with your household before approving drawings.
Confirm permit requirements with your local building department for electrical, plumbing, and structural work.
Get three contractor bids on an identical written scope; verify license and insurance for each.
Have a licensed electrician assess the panel and confirm dedicated circuits for all major appliances.
Have a licensed plumber confirm drain and supply line locations before finalizing the island or sink position.
Order long-lead items early — custom cabinets, specialty tile, and appliances can take 6–14 weeks; get delivery dates in writing.
Specify interior organizers and lighting fixtures in the cabinet and electrical orders, not as afterthoughts.
Confirm the flooring installation sequence with your contractor: cabinets first, then flooring.
Set your contingency at 15–20% of total hard costs and keep it liquid.
Sign a detailed contract with milestones, a change-order clause, and warranty terms before any demo begins.
Plan a temporary kitchen — a microwave, mini-fridge, and electric skillet in another room — for the duration of the project.
Must-ask contractor questions:
What permits will you pull, and who schedules the inspections?
How do you handle a change order — what’s the process and the timeline impact?
Who are your licensed subcontractors for electrical and plumbing?
What to measure and record:
Ceiling height at multiple points (older homes often vary)
Door and window rough openings
Distance from sink drain to nearest wall
Appliance dimensions from the manufacturer spec sheet, not the box
What do contractors and designers say goes wrong most often?
The pattern contractors see repeatedly is straightforward: homeowners make purchasing decisions before the planning is finished. Appliances get ordered before cabinet specs are set. Cabinets get ordered before the electrician has confirmed outlet locations. Then everything arrives at once and nothing fits together cleanly.
Measure all appliances — including small built-ins and microwaves — before final cabinet specifications. A 1–2 inch discrepancy can force costly adjustments that delay the entire project and add significant expense to what should have been a straightforward installation.
That’s not a hypothetical. A kitchen where the built-in microwave was ordered based on the old cabinet dimensions — before the new layout was finalized — required a custom filler panel and a modified cabinet box to make it work. The fix added two weeks and a change order. Ordering the appliance after the cabinet drawings were approved would have cost nothing extra.
Three things contractors consistently recommend homeowners enforce:
Hold vendor lead times in writing. Get the expected delivery date documented at the time of order, not verbally at the showroom.
Confirm the installation sequence before demo. Flooring goes in after cabinets; tile goes in after rough-in is inspected. Sequence errors are expensive to reverse.
Don’t demo the old kitchen until materials are confirmed on-site or in a local warehouse. Keeping the old kitchen functional as long as possible reduces the need for costly temporary solutions.
Pro Tip: Ask your cabinet supplier for the exact interior dimensions of every cabinet box before ordering organizers. Nominal cabinet sizes and actual interior dimensions are not the same, and a $200 pull-out shelf that’s a half-inch too wide is a frustrating waste.
The Coastalhrli perspective on avoiding these mistakes
At Coastal Home Renovations, the process starts before a single cabinet is touched. Every project begins with a design review that maps the existing electrical and plumbing against the proposed layout, flags appliance dimension conflicts, and confirms permit requirements with the local building department. That upfront work is what prevents the change orders that derail budgets and timelines.
Client-facing practices that keep projects on track:
Transparent milestone timelines shared before demo begins
Appliance dimension verification against cabinet drawings before ordering
Licensed subcontractors for all electrical and plumbing rough-in work
Contingency planning built into every project budget
Accessibility considerations raised during the design phase, not after
Coastal Home Renovations: kitchen remodeling done right in Suffolk County
Coastal Home Renovations has spent over 20 years completing kitchen renovations across Suffolk County — and the most consistent thing we’ve seen is that the mistakes covered in this article are entirely preventable with the right process in place from day one.

Every Coastal kitchen project includes a pre-construction design review, licensed electrical and plumbing subcontractors, appliance dimension verification before cabinet orders are placed, and a written milestone schedule so you know exactly what’s happening and when. We pull permits, coordinate inspections, and flag accessibility opportunities early — because retrofitting them later costs far more than planning for them now. Browse our completed project gallery to see how these principles translate into finished kitchens across Long Island.
Ready to get your kitchen remodel right the first time? Contact Coastal Home Renovations for a personalized consultation and a clear, no-surprises project plan.
Sources
13 Kitchen Remodel Mistakes to Avoid According to Professional Designers | Architectural Digest
The 6 Biggest Kitchen Renovation Mistakes Designers See All the Time | Real Simple
10 common kitchen layout mistakes and how to avoid them | Houzz
10 Kitchen Renovation Mistakes to Avoid, According to Interior Designers | Martha Stewart
The kitchen renovation mistakes never to make | Homebuilding
11 Kitchen design mistakes designers want you to avoid | Good Housekeeping
Recommended
Comments