
Water Damage Insurance Claims: What Homeowners Must Do

Most homeowners insurance policies cover sudden and accidental water damage — a burst pipe, a washing machine that overflows, a water heater that fails without warning. What they don’t cover is flooding from outside your home, sewer backup without a specific endorsement, or damage that built up quietly over months because a slow drip went unaddressed. That distinction is the hinge on which most water damage insurance claim decisions turn.
If you’re standing in a wet room right now, here’s what to do in the next hour:
Cut power to the affected area at the breaker before stepping into standing water.
Shut off the water source (main shutoff valve or the supply line feeding the appliance).
Spend 10–20 minutes photographing and filming everything before you move a single item.
Call your insurer to open a claim — most carriers expect notice within 24–72 hours of discovery.
Begin reasonable mitigation (extract water, set fans, call a restoration company) only after you’ve documented the scene.
Acting within that first hour protects your coverage. Delay, or skip documentation, and you hand the adjuster a reason to question whether the damage was sudden at all.
Key Takeaways
A water damage insurance claim succeeds or fails on three things: how fast you report it, how thoroughly you document it before mitigation, and whether the damage qualifies as sudden and accidental under your policy’s terms.
Point | Details |
Act within 24–72 hours | Notify your insurer the same day you discover damage; late reporting is a common denial trigger. |
Document before you clean | Photograph and video the scene before restoration crews move anything — this is your primary evidence. |
Know your exclusions | Floods, sewer backup without endorsement, and gradual leaks are not covered by standard policies. |
Understand ACV vs. RCV | Most policies pay depreciated value first; the holdback releases only after you submit a final repair invoice. |
Coastalhrli for Suffolk County claims | Coastalhrli provides emergency mitigation, Xactimate-compatible scopes, and full rebuilds to support your claim from discovery through settlement. |
Table of Contents
What does homeowners insurance actually cover for water damage?
When should you call a restoration contractor, public adjuster, or attorney?
How long does a water damage claim take — and will it affect your premiums?
A field perspective on water damage claims in Suffolk County
How Coastalhrli supports water damage restoration and insurance claims
What does homeowners insurance actually cover for water damage?
Coverage follows one principle: the damage must be sudden and accidental. A pipe that bursts overnight qualifies. A pipe that’s been seeping behind a wall for two years does not, even if you genuinely didn’t know about it.
Perils that standard policies typically cover:
Burst or frozen pipes (sudden failure, not gradual corrosion)
Overflow from a washing machine, dishwasher, or water heater
Accidental discharge from a plumbing fixture
Water used to fight a fire in your home
Ice dam damage that forces water through the roof
Standard exclusions — where most claims get denied:
Flood damage from rising external water — such as storm surge, overflowing rivers, or heavy rain pooling against your foundation — requires a separate flood policy through the NFIP or a private insurer
Sewer or drain backup, unless you’ve added a sewer-backup endorsement to your policy
Gradual leaks, seepage, or any damage tied to deferred maintenance
Wear and tear on plumbing or appliances
Mold that results from a long-standing moisture problem (many policies cap mold coverage or exclude it entirely)
Vacancy: if your home sits empty beyond a carrier-defined period (often 30–60 days), water damage coverage may be suspended
The Texas Department of Insurance frames it plainly: policies cover sudden and accidental events, not the slow consequences of ignored maintenance.
Endorsements worth asking your agent about:
Sewer/drain backup endorsement (usually $50–$150/year, often worth it)
Service line coverage for buried supply lines
Separate flood policy — check your NFIP eligibility at Floodsmart
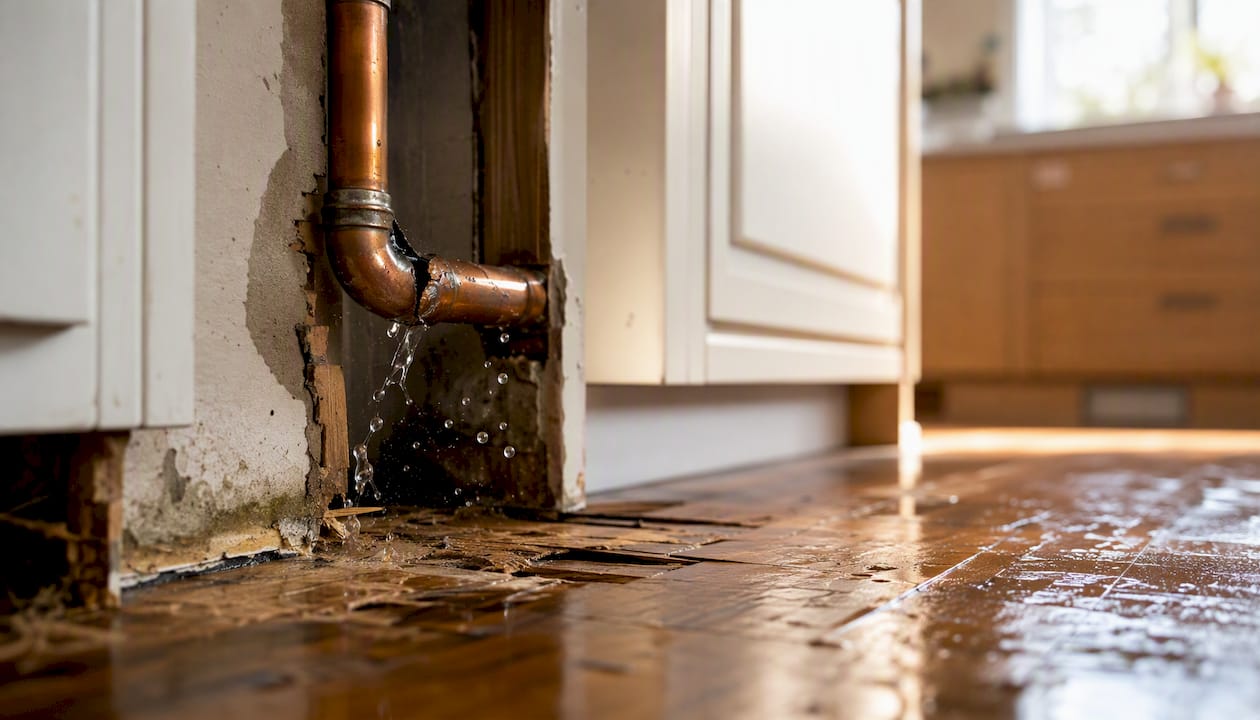
Pro Tip: Fresh fracture lines on a pipe, no rust at the break point, and clean water staining that doesn’t show layered discoloration are physical signals that support a “sudden” event. Adjusters look for rust, mineral buildup, and stacked stain rings as evidence of a long-running leak. Photograph the pipe or appliance failure point as close-up as possible — that image can be the difference between coverage and denial.
Homeowners in flood-prone areas of Long Island should also consider basement moisture control as a preventive measure; basement waterproofing upgrades can reduce the risk of gradual seepage that insurers routinely exclude.
How to file a water damage insurance claim, step by step
The claim process has a clear sequence. Skipping steps or reordering them is the most common reason payouts shrink.
Step 1: Safety and source control Shut off electricity to the affected area before entering standing water. Locate the shutoff valve for the failed supply line or cut the main water supply to the house. Don’t re-enter until the electrical risk is resolved.
Step 2: Document before you mitigate Spend 10–20 minutes capturing the scene before restoration crews or even a mop touches anything. Shoot wide-angle photos of each affected room, then close-ups of the source (the burst pipe, the failed appliance connection, the overflow point), water lines on walls, saturated flooring, and damaged contents. Narrate a short video walking through the space — your own voice describing what you’re seeing creates a timestamped record. Capture serial numbers on damaged appliances.
Step 3: Notify your insurer Call your insurer’s claims line the same day, or at the latest within 24–72 hours of discovery. Record the claim number, the adjuster’s name and direct contact, and the date and time of every conversation. Most carriers also accept claims through their mobile app or website — use whichever creates a written record.
Step 4: Mitigate reasonably, and keep every receipt Once documentation is complete, begin mitigation: extract standing water, run dehumidifiers and air movers, and call a licensed restoration company. Your policy requires you to take reasonable steps to prevent further damage. Save every receipt — mitigation costs are typically reimbursable. Do not throw away damaged materials until the adjuster has inspected and documented them.
Step 5: Meet the adjuster The adjuster will schedule a walkthrough, usually within 3–7 days of the claim opening. Walk the entire loss with them. Bring any contractor estimates you’ve received and, if your restoration company has prepared one, an Xactimate-format scope. Review every line item in the adjuster’s scope before signing anything — missing line items (drying equipment, wall cut-out, contents inventory) directly reduce your settlement.
Step 6: Understand the settlement mechanics Many carriers pay actual cash value (ACV) first, then release a depreciation holdback once you submit proof of completed repairs (final contractor invoice). Know whether your policy is ACV or replacement cost value (RCV) before the adjuster arrives — it changes how you negotiate.
Step 7: Dispute an inadequate settlement If the initial offer is low, request a re-inspection and provide independent contractor estimates. Most policies include an appraisal clause: both sides hire independent appraisers, and a neutral umpire resolves disagreements. For larger disputes or bad-faith denials, a public adjuster or attorney may be warranted.
Compact documentation checklist:
Wide-angle and close-up photos of every affected room
Video walkthrough with verbal narration (timestamped)
Photos of the failure source (pipe, appliance, fixture)
Inventory of damaged personal property with estimated values
Receipts for all mitigation work and temporary repairs
Restoration company’s written scope and estimate
All insurer correspondence, claim numbers, and adjuster contacts
How insurers calculate what they’ll pay you
Understanding the payment mechanics before the adjuster arrives prevents surprises.
Dwelling vs. personal property coverage
Dwelling coverage (Coverage A) pays for structural repairs: walls, floors, ceilings, built-in cabinets, and fixed systems like plumbing. Personal property coverage (Coverage C) covers movable contents — furniture, appliances, clothing, electronics. These are separate coverage limits with separate deductibles on some policies, so a single water event can trigger two distinct claim tracks.
ACV vs. RCV: the number that matters most
Actual Cash Value (ACV) | Replacement Cost Value (RCV) | |
What it pays | Depreciated value of damaged items/structure | Full cost to replace with like kind and quality |
When you receive it | At initial settlement | ACV paid first; depreciation holdback released after repairs are invoiced |
Documentation needed | Adjuster’s scope | Final contractor invoice proving repairs are complete |
Best for | Lower premium policies | Homeowners who want full repair coverage |
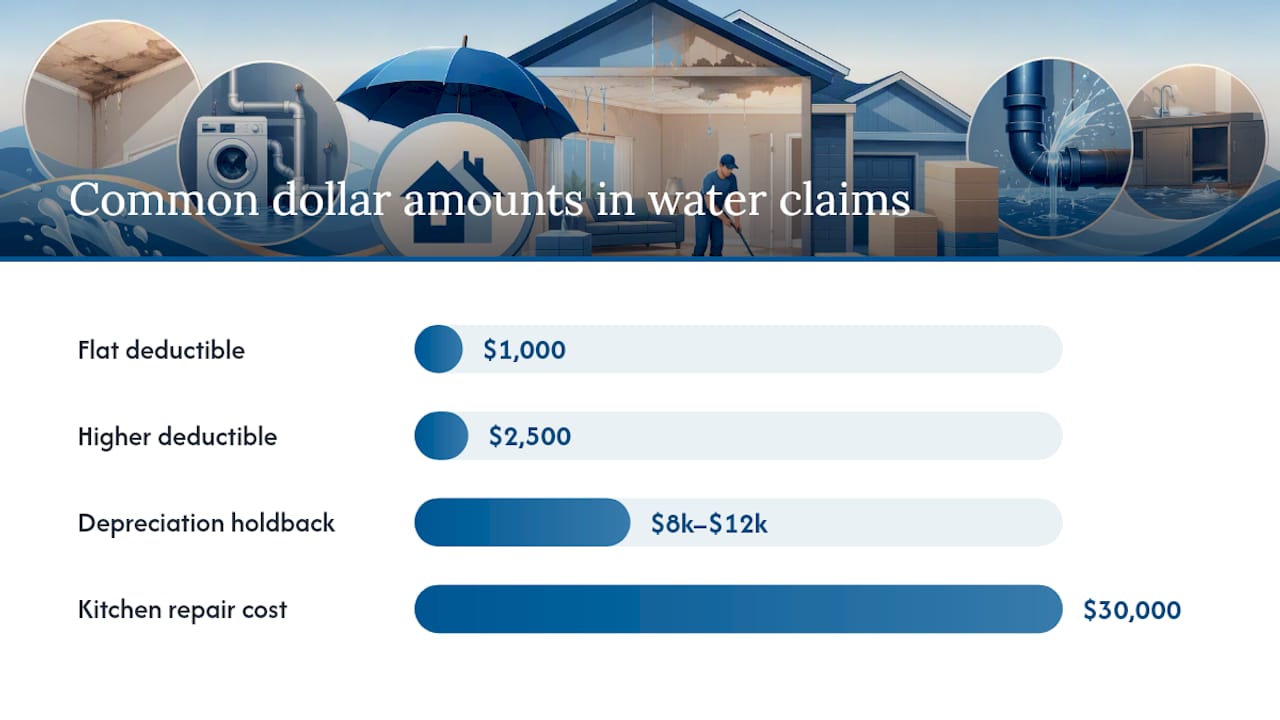
Most standard policies default to ACV unless you’ve specifically purchased RCV coverage. On a $30,000 kitchen repair, the depreciation holdback can easily run $8,000–$12,000 — money you won’t see until the work is done and invoiced.
Deductibles
A flat-dollar deductible (say, $1,000 or $2,500) applies to most water claims.
Additional Living Expense (ALE)
If the damage makes your home uninhabitable, ALE coverage (Coverage D) pays for temporary housing, meals above your normal food budget, and other reasonable extra costs while repairs proceed. ALE is typically capped as a percentage of your dwelling coverage and has a time limit. Keep receipts for every ALE expense — the insurer won’t reimburse what you can’t document.
According to the Insurance Information Institute, a notable share of insured homes file water or freezing-related claims annually, with claim costs varying widely depending on the damage severity. That average masks a wide range: a simple appliance overflow may settle for a few thousand dollars, while a burst pipe behind a finished wall can run well above $30,000 once drying, demolition, and reconstruction are complete.
Why water damage claims get denied — and how to avoid it
Denial reasons cluster around a short list of predictable issues. Most are avoidable.
The most common reasons insurers deny or reduce claims:
Gradual or maintenance damage. This is the leading denial reason. If an adjuster finds rust, layered mineral staining, or soft rot around the failure point, they’ll classify the damage as long-term neglect rather than a sudden event. Ignored maintenance — a known dripping pipe, a cracked supply line you noticed months ago — almost always leads to denial.
Late reporting. Waiting days or weeks to notify your insurer gives them grounds to argue the damage worsened due to your inaction.
Failure to mitigate. Policies require reasonable steps to prevent further damage. Leaving standing water for 48 hours while you wait for a contractor gives the insurer a legitimate reduction argument.
Excluded perils. Filing a flood claim under a standard homeowners policy, or a sewer backup claim without a backup endorsement, will be denied on coverage grounds regardless of documentation quality.
Vacancy clause violations. If your home was unoccupied beyond the policy’s vacancy threshold when the damage occurred, coverage may be suspended.
Misrepresentations on the proof of loss. Overstating the value of damaged contents, or claiming items that weren’t damaged, can void the entire claim under fraud provisions.
How adjusters identify long-term leaks:
Inspectors look for rust at the failure point, multiple layers of staining at different heights (indicating repeated wetting and drying cycles), soft or discolored subfloor material extending well beyond the immediate area, and odor consistent with long-standing moisture. A fresh pipe fracture shows clean metal at the break, no corrosion, and water damage confined to the area below the failure point.
Tactical steps to reduce denial risk:
Document the failure point immediately and in detail — close-up photos of the pipe, fitting, or appliance connection
Keep all damaged materials in place until the adjuster inspects them
Hire an IICRC-certified restoration technician who produces written moisture readings and a drying log
Report to your insurer the same day you discover the damage
Get FEMA’s mold guidance and follow it — prompt mitigation is your best defense against a secondary mold-related denial
Self-assessment red flags — extra scrutiny likely if:
The damage is in an area you rarely access (crawlspace, inside a cabinet)
There’s visible rust, mineral buildup, or discoloration around the failure point
The affected area smells musty before you’ve even started cleanup
You’ve had a plumber note the same pipe or fitting as a concern in the past
The damage is in a room that’s been unused or closed off for months
When should you call a restoration contractor, public adjuster, or attorney?
The right professional at the right stage can significantly change your outcome.
Restoration contractor: call immediately
If you have standing water, visible structural saturation, or any reason to suspect mold risk (warm temperatures, more than 24–48 hours of moisture), call a licensed restoration contractor the same day. Mold can begin colonizing within 24–48 hours of a water event. A contractor who understands insurance workflow will document moisture readings, produce a written drying log, and prepare a scope in a format adjusters recognize.
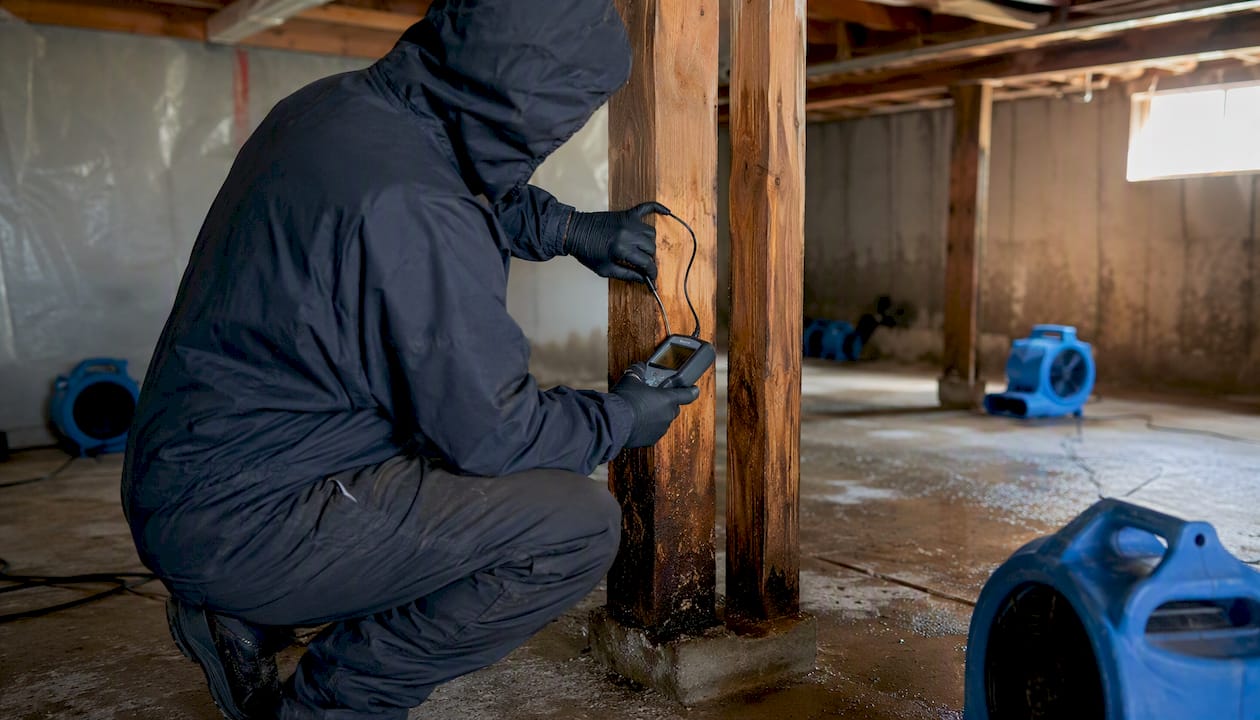
Look for contractors with IICRC certification — the Institute of Inspection, Cleaning and Restoration Certification publishes the industry standards for water damage mitigation and mold remediation. IICRC-trained technicians follow documented drying protocols that hold up to adjuster scrutiny.
Pro Tip: Ask any restoration contractor upfront whether they produce an Xactimate-format scope. Contractors who work in insurance restoration regularly know how to document line items — wall cut-out, drying equipment, contents manipulation — in the same format adjusters use. That alignment reduces back-and-forth and speeds settlement.
Public adjuster: consider after a disputed or underpaid settlement
A public adjuster works for you, not the insurer. They’re worth considering when the insurer’s initial offer seems significantly below your contractor’s estimate, when the adjuster’s scope is missing major line items, or when the insurer has denied a claim you believe is covered.
Attorney: for bad-faith denials or large commercial-level disputes
If your insurer denies a claim without a reasonable basis, delays payment unreasonably, or misrepresents your policy terms, that may constitute bad faith under your state’s insurance code. An attorney who specializes in insurance coverage disputes can evaluate whether you have a bad-faith claim and whether the potential recovery justifies litigation. For most residential water claims, a public adjuster resolves the dispute without legal action.
Vetting checklist for restoration contractors:
IICRC certification (Water Damage Restoration Technician or Applied Microbial Remediation Technician for mold)
Valid contractor’s license in your state
Proof of general liability and workers’ compensation insurance
Written scope of work before work begins
Transparent, itemized billing
Documented timeline with start and completion dates
References from prior insurance restoration projects
How long does a water damage claim take — and will it affect your premiums?
Typical claim timeline:
First 24 hours: Safety, source control, documentation, insurer notification, emergency mitigation begins
Days 3–7: Adjuster inspection and initial scope
Weeks 1–3: Restoration company completes drying; contractor estimates finalized; adjuster’s scope reviewed and disputed if needed
Weeks 2–8: Settlement offer issued; ACV payment released; repairs begin
After repairs complete: Final invoice submitted; depreciation holdback (RCV policies) released
Hidden damage stretches every stage. A burst pipe inside a finished wall may require demolition before the full scope is known, pushing the timeline out by weeks. Mold discovered during drying adds a remediation phase before reconstruction can begin. Structural repairs — floor joists, load-bearing walls — require permits and inspections that add time regardless of how quickly the contractor is ready.
Premium and insurability impact:
A single water damage claim generally won’t cause your insurer to non-renew your policy, but it will appear in your CLUE (Comprehensive Loss Underwriting Exchange) report for seven years. Carriers use CLUE reports when underwriting new policies, so a claim can affect your premiums or your ability to switch carriers. Two claims within a short period raises the risk of non-renewal significantly. Check your state’s Department of Insurance website for state-specific rules on how claims affect renewals — rules vary meaningfully by state.
How common and costly are water damage claims in the U.S.?
Water damage is the second most common homeowners insurance claim in the country, behind only wind and hail. The Insurance Information Institute reports that roughly 1 in every 67 insured homes files a water or freezing-related claim each year, with average claim costs near $11,000 over a five-year period.
Perils typically excluded from standard homeowners policies:
External flooding (rising water from storms, rivers, or storm surge)
Sewer or drain backup without a specific endorsement
Groundwater seepage through foundation walls
Overflow from a body of water (lake, pond, ocean)
Every one of those exclusions requires separate coverage. For homeowners in designated flood zones, a flood insurance policy through NFIP or a private insurer is not optional — it’s the only way to recover from a flood event. Long Island homeowners, particularly those in coastal communities, face meaningful flood exposure that a standard homeowners policy simply doesn’t address.
A field perspective on water damage claims in Suffolk County
Coastal Home Renovations has worked on water damage restoration projects across Suffolk County for over 20 years. Long Island’s coastal geography creates a specific set of risks that mainland homeowners don’t always face: salt-air corrosion accelerates pipe and fitting degradation, storm surge and heavy coastal rainfall push water into basements and crawlspaces through pathways that look like internal plumbing failures to an untrained eye, and older housing stock in many Suffolk communities means aging supply lines that can fail without much warning.
The single most consistent pattern in claims that go sideways is documentation that happens too late. By the time a homeowner calls a restoration company, materials have been moved, water lines on walls have been wiped down, and the failure source has been repaired without being photographed. The adjuster arrives to a partially cleaned space and has no choice but to estimate — and estimates without physical evidence tend to favor the insurer.
Technicians certified to IICRC standards bring moisture meters, thermal imaging, and drying logs that create an objective record of the damage extent. That record is what turns a disputed claim into a paid one. Homeowners who call a certified restoration team before they start cleanup, and who keep every damaged material in place until the adjuster has seen it, consistently get better outcomes than those who clean first and document later.
How Coastalhrli supports water damage restoration and insurance claims
Water damage in your home doesn’t end when the water stops. The documentation, the adjuster walkthrough, the scope review, the rebuild — each stage carries its own risk of leaving money on the table or extending your displacement.

Coastalhrli’s water damage restoration services cover the full arc: emergency mitigation with moisture documentation, Xactimate-compatible scopes that adjusters recognize, mold remediation, and complete structural rebuilds for kitchens, bathrooms, and living spaces. For homeowners whose damage extends into finished spaces, the team handles interior reconstruction from framing through finish work, coordinating directly with your insurer’s timeline so repairs don’t stall waiting on approvals.
With over 20 years of restoration and renovation experience in Suffolk County, Coastalhrli understands both the technical requirements of a properly dried and rebuilt space and the documentation insurers need to release full payment. The team produces written scopes, drying logs, and final invoices in the formats carriers expect, reducing the back-and-forth that delays settlements.
If you’ve discovered water damage and want a professional assessment, contact Coastalhrli to schedule an inspection. The earlier a certified team documents the loss, the stronger your claim.
Sources
These are the primary sources behind the guidance in this article. Each is worth bookmarking if you’re actively managing a claim or shopping for coverage.
Insurance Information Institute — Facts + Statistics: Homeowners and renters insurance
Texas Department of Insurance — When are water damage and mold covered by insurance?
FEMA — Mold: A basic guide to mold, moisture, and your home (brochure)
FEMA / FloodSmart — information on flood risk and flood insurance
This article is general information, not a substitute for advice from a qualified financial advisor. Consult a qualified financial professional about your own circumstances before acting on anything here.
Recommended
Comments